Olaf is by far one of the most beloved characters in Disney’s Frozen universe. This happy-go-lucky snowman has quickly become associated with the holidays and Christmas cheer. With this simple Olaf drawing tutorial, you’ll be able to add some pizzazz to your holiday decorations and crafting sessions.
Who Is Olaf (And What Is Frozen)?
Olaf is a sidekick character in the Disney animated feature films Frozen, Frozen 2, and Frozen: Olaf’s Adventure. Olaf’s character is voiced by the actor Josh Gad. Since his introduction in the first Frozen film, Olaf has become one of the most popular comedic relief characters in Disney’s canon.
The Origins of Disney’s Olaf
The name Olaf is Nordic for “treasure,” and Olaf was created from Elsa’s magical ice powers. Elsa brought Olaf to life to entertain herself and her little sister Anna, and the friendly snowman is reintroduced to the girls in adulthood when they leave Arendelle to try and lift the kingdom’s frozen curse.
What Is Olaf’s Role in the Movie Frozen?
Olaf serves as the friendly, outgoing, and loyal friend to the princesses Anna and Elsa. Even though he might seem naive because of his fascination with summer and hot temperatures, Olaf proves again and again that he is one of the most reliable companions the princesses of Arendelle have.
Learning how to draw Olaf is easy once you break the character down into a step-by-step tutorial. Keep reading below to learn how simple it is to draw Olaf and use him in your Christmas decorations.
Olaf Drawing Step-by-step Guide
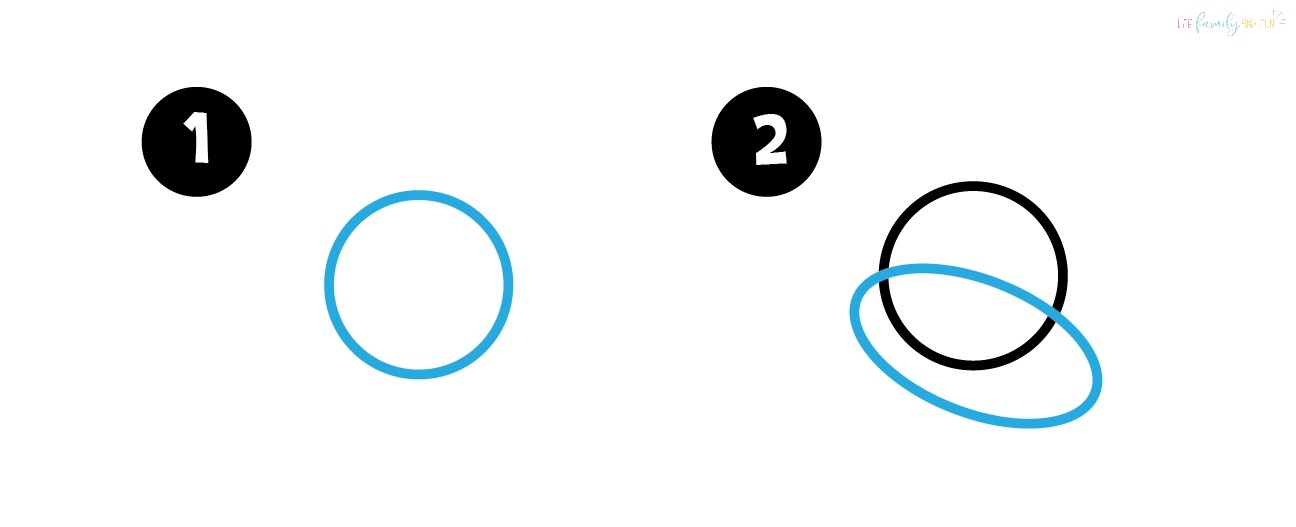
Step 1: Start Olaf’s head
To start drawing Olaf, you’ll begin by drawing the basic shapes for Olaf’s head. Create a round circle to form the back shape of Olaf’s head.
Step 2: Create the face foundation for your Olaf drawing
then overlap this circle with a long oblong oval. This will be the foundation for Olaf’s face.

Step 3: Combine the shapes
For the third step of the drawing, add connecting lines between the circle and the oval to combine the shapes and make the outline between them smoother.
Step 4: Draw U-shape
Beneath these conjoined round shapes, draw a sloping U-shape that joins at either end of the oval and narrows at the opposite base. This will form Olaf’s jaw and neck.

Step 5: Outline Olaf’s body
Now that you have the outline of Olaf’s head completed, it’s time to move on to the snowman’s body. Make a small U-shape underneath Olaf’s chin to make up the first snowball that forms his body, then place a larger circle underneath the small circle to form Olaf’s base.
Draw two small rounded stumps underneath the larger snowball to represent Olaf’s legs.
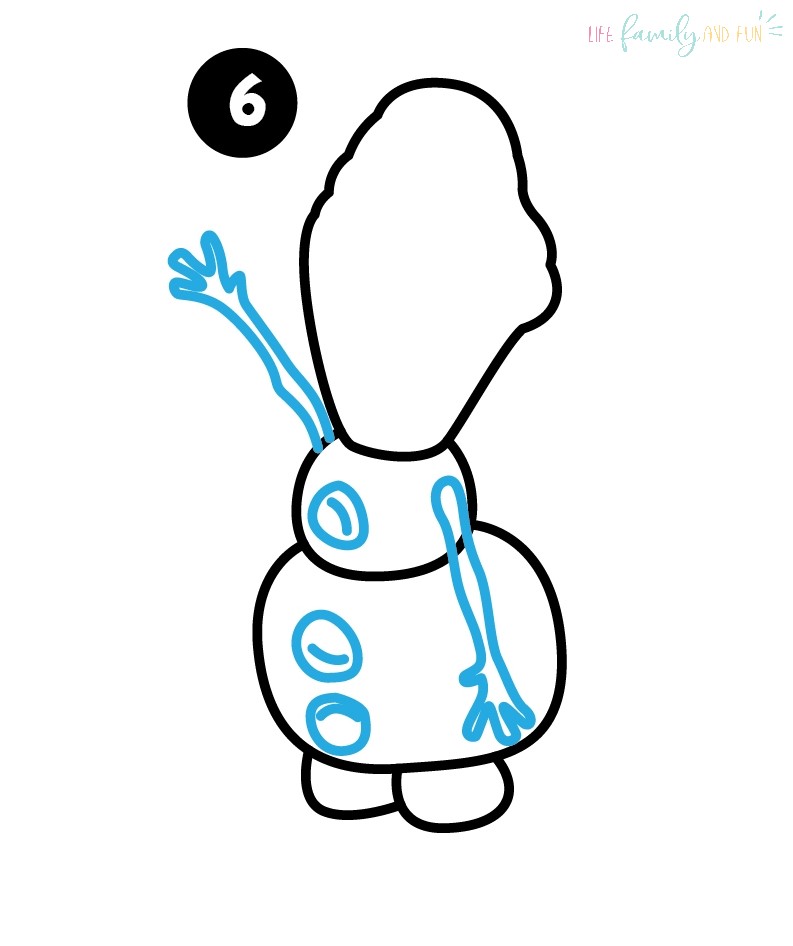
Step 6: Add the arms and details to your Olaf drawing
The next step of drawing Olaf is to add details to the snowman’s body. Draw two sticks on either side of the snowman’s smaller snowball to represent Olaf’s arms, then draw several small circles down the front of Olaf’s body to represent his black rock buttons.
Drawing small lines on the buttons can give them depth and add detail.
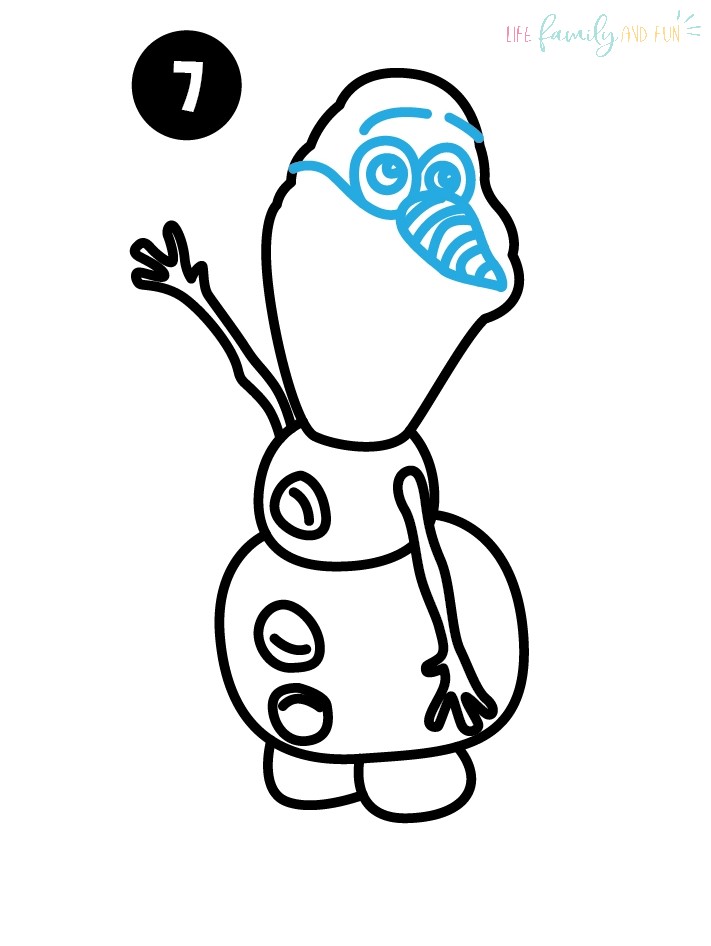
Step 7: Draw the eyes and nose
After completing the details on Olaf’s face, the next step is to start the details on the snowman’s face. This is the most complicated part of the drawing.
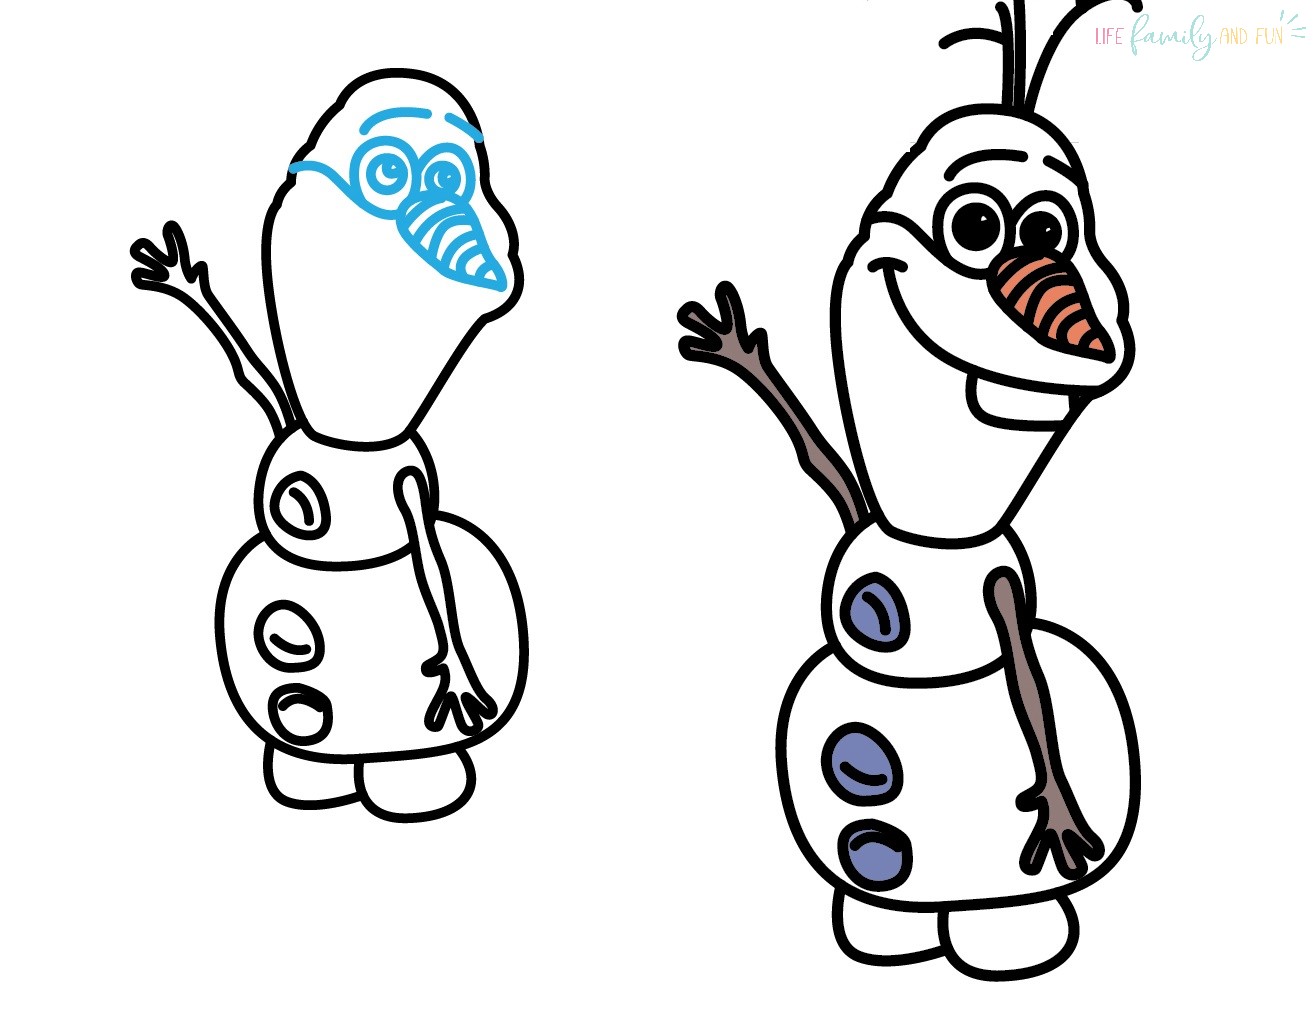
Draw a carrot in the middle of Olaf’s face to represent his nose, then draw a line from the carrot to the side of the snowman’s head to represent his cheek. Add the snowman’s eyes and eyebrows, along with a few sprigs of hair on the top of his head.
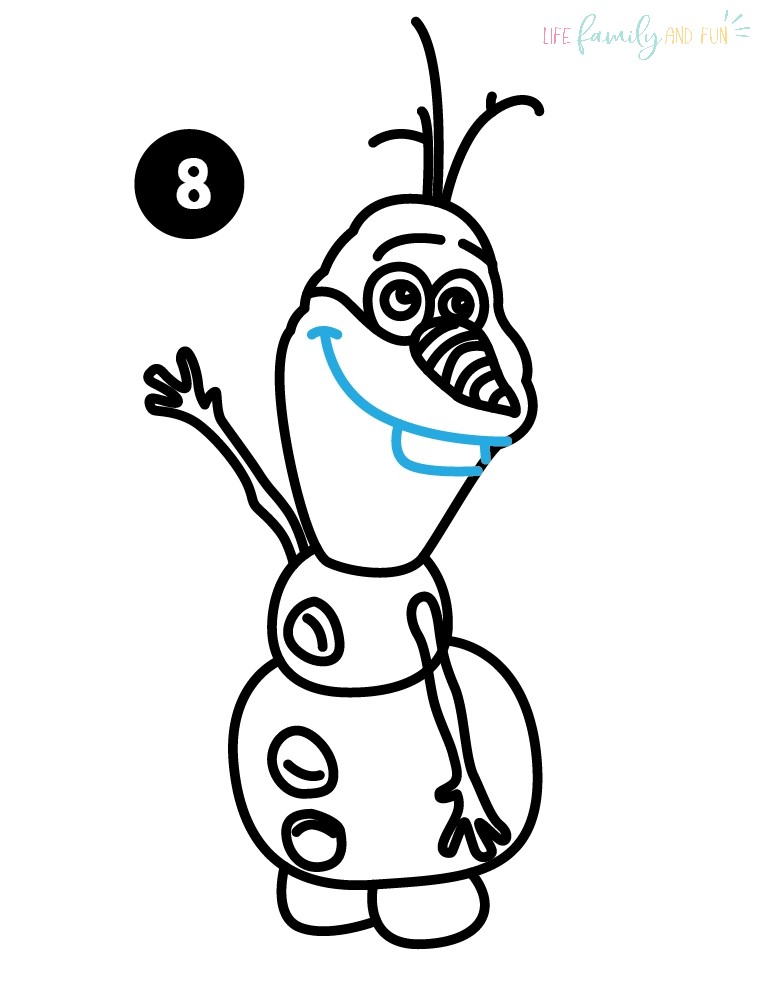
Step 8: Complete the face and color you Olaf drawing
The final step in drawing Olaf is to sketch the snowman’s iconic grin. Draw a smile on Olaf’s face, then draw a rectangle under the smile line to represent Olaf’s large buck tooth. Then simply color and congratulations, your drawing of Olaf is complete.
Olaf Drawing FAQ
Is It Legal to Make an Olaf Drawing?
Drawing Olaf is considered fanart, which is technically illegal to create since it infringes on the creator’s copyright. However, if you’re just drawing Olaf for personal use in your Christmas decorations or crafting sessions around the house, you shouldn’t have anything to worry about. Just don’t try to sell crafts with Olaf on them to avoid copyright infringement.
How Many Buttons Does an Olaf Drawing Have?
In the Disney movies, Olaf is modeled with three black rock buttons. One of these buttons is located on his central (smaller) ball, while the other two buttons are located on the front of his bottom (larger) ball.
How Do You Draw Olaf’s Eyes?
Drawing Olaf’s eyes correctly is an important part of representing the character in a way that makes them recognizable. To draw Olaf’s eyes correctly, draw the eyes with a thick upper outline to represent the snowman’s eyelids, and don’t forget to include eyebrows.
What Supplies Do You Need to Draw Olaf?
You can use all kinds of different art supplies to draw Olaf, from colored pencils and crayons to markers and watercolor paints, but here are a few things you need to make your drawing look good:
- Black outlining tool: Regardless of whether you use colored pencils or markers, you’ll want a nice dark outlining tool to add contrast to your drawing’s primary lines.
- Colors: You don’t need many colors to draw Olaf since he’s white with a black outline, but you’ll need orange to represent Olaf’s carrot nose and brown for his twig arms.
Frozen is one of the most famous Disney films ever made, so chances are if you can learn to draw Olaf you’ll draw admiration from every little kid and Disney fan in the vicinity. This Olaf drawing tutorial should give you a jumping-off point for learning how to draw this iconic Disney character for holiday crafts or just some quick drawing practice.