Part of making your home look merry and bright at Christmas time is putting up decorations, and nothing says Christmas like homemade decorations. One of the most iconic symbols of the Christmas season is the Christmas Tree. If you learn to draw this special seasonal decoration, you can incorporate your Christmas tree drawing into other holiday crafts.
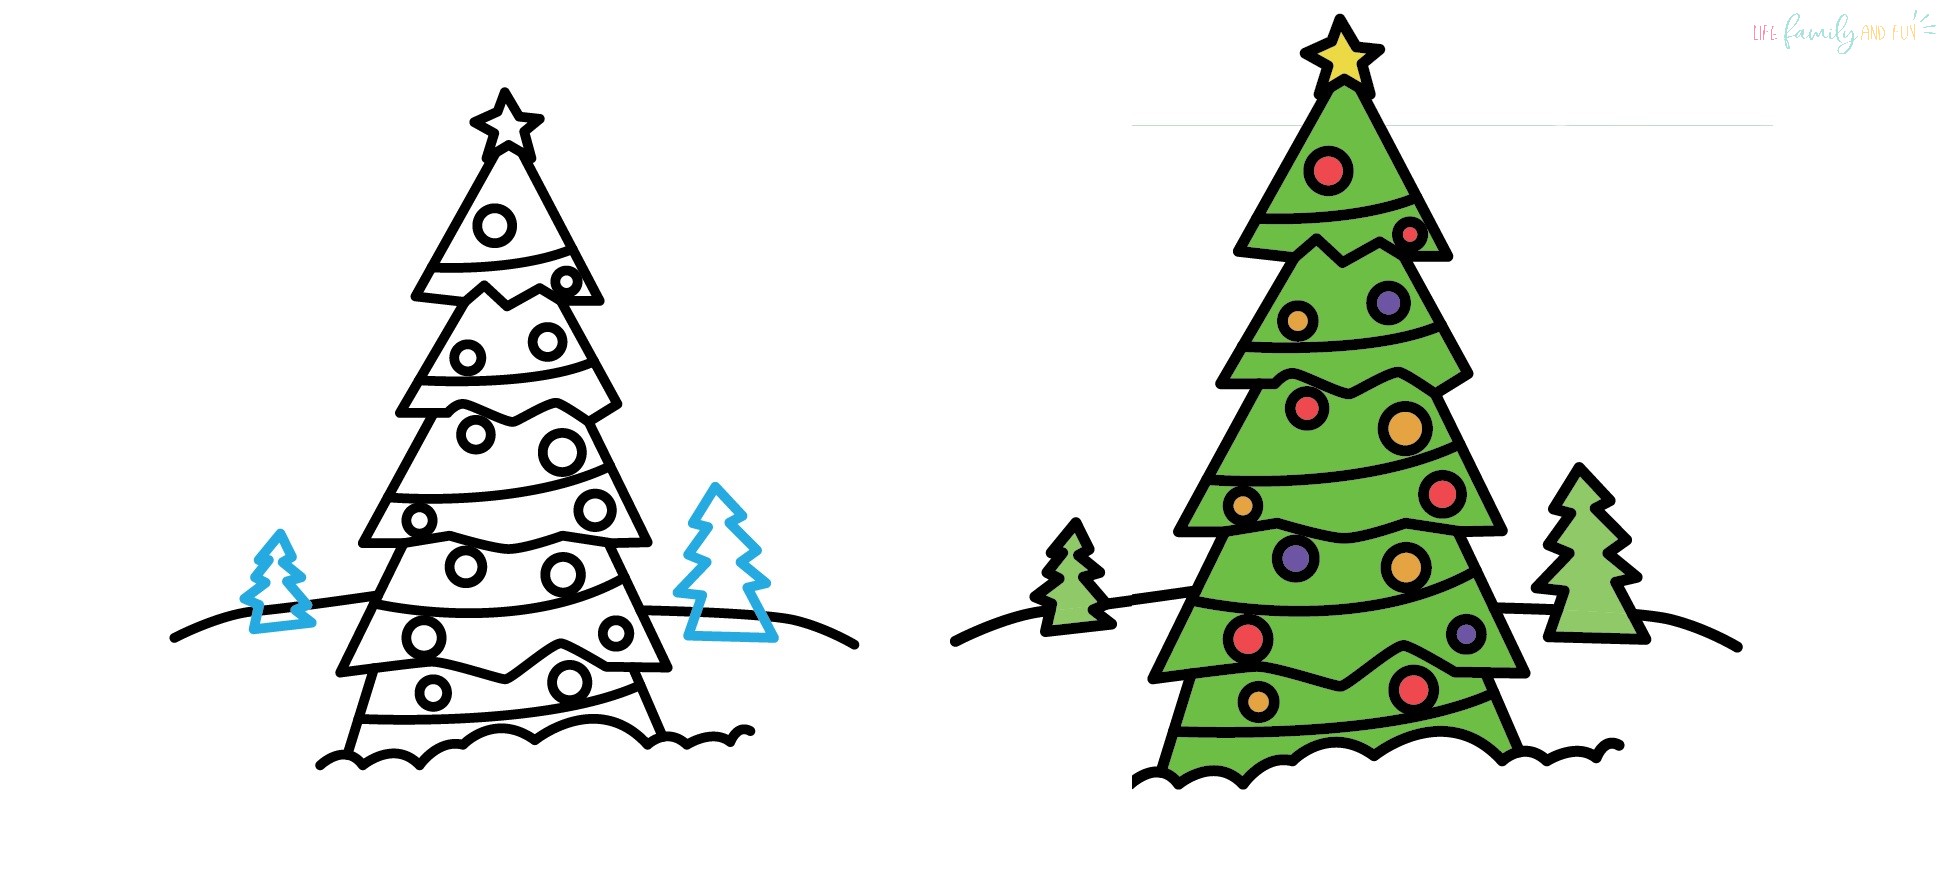
Learning how to draw a Christmas tree isn’t that hard as long as you break the process down into easy steps. Below you’ll find six steps that anybody can use to draw a Christmas tree for holiday crafts and decor.
What Is a Christmas Tree?
A Christmas tree is an evergreen tree that is usually decorated during the month of December to celebrate the holiday season. Christmas trees are decorated with various types of decor including garlands, glass ornaments, and string lights with presents usually being stored under the Christmas tree until Christmas Day when they’re opened.
What Parts Make Up a Christmas Tree Drawing?
Drawing a simple Christmas tree can be accomplished by breaking the steps down into its more basic parts. Here are the different parts that you’re going to include in drawing your Christmas tree:
- Star: The star that tops the Christmas tree is one of the most iconic decorations used in decking them out. Occasionally an angel or other decoration is used in place of a star, but the Christmas tree topper is usually lit up.
- Branches: The branches of the Christmas tree are what hold the decorations that cover it. In your drawing of a Christmas tree, the branches make up the outline and the tiered sections of the Christmas tree.
- Garlands: To distinguish a Christmas tree from a drawing of a regular tree, the tree has to have obvious decorations. Drawing garlands on the tree is a simple way to communicate this fact to the viewer since it only requires a few lines.
- Bulbs: Glass bulbs are one of the most popular decorations used on Christmas trees, and one of the most easily recognizable ones. You can draw other decorations on your Christmas tree if you’re feeling fancy, but plain circles are good enough to get the point across in a simple drawing.
- Ground: Without a ground line, the Christmas tree will appear to be floating in space. Adding the ground shows that the tree is planted and gives you space to include additional details if you want.
- Background trees: Adding smaller background trees helps put your Christmas tree front and center and gives the entire drawing more depth.
By including all of these details, you’ll leave no doubt in the viewer of your drawing that what they see is a Christmas tree.
What Supplies Do You Need to Draw a Christmas Tree?
You can use several different kinds of supplies for drawing Christmas trees, so it’s a good idea to experiment and see which ones you like best. Here are just a few art supplies that are a good match for Christmas tree drawing projects:
- Colored pencils: Using colored pencils to draw Christmas trees gives you a lot of precision for details in the decorations, and a lot of options for color choices, too.
- Markers: Colored markers can give you deep, saturated jewel tones in your holiday drawing. Be careful of markers that bleed through to the other side of the paper, however.
- Pen and paper: You don’t need complicated supplies to draw a good-looking Christmas tree. As long as you have a pen or pencil and some drawing paper, you’re in business.
No matter which type of drawing supplies you go with, you’ll use the same basic design elements to draw a traditional Christmas tree. Check out the tutorial below for a step-by-step guide on how to do it.

How to Draw a Christmas Tree Step-by-step Guide
Step 1: Outline the Christmas tree

The first step to drawing a Christmas tree is to draw the outline of the tree. It’s easiest to start your Christmas tree by drawing the star at the top of the tree.
From the star, draw two lines downwards at a slant to either side and connect the two lines with a connecting line that is drawn with a series of up and down motions, creating a jagged edge. This bottom line helps represent the layers of branches on the Christmas tree.
After creating the top layer of the tree, draw two more lines slanting downwards from the bottom edges of the first section, then another connection line beneath them to form the bottom of the second tree layer. This should give you two distinct layers of branches in your Christmas tree.
Step 2: Layer the branches
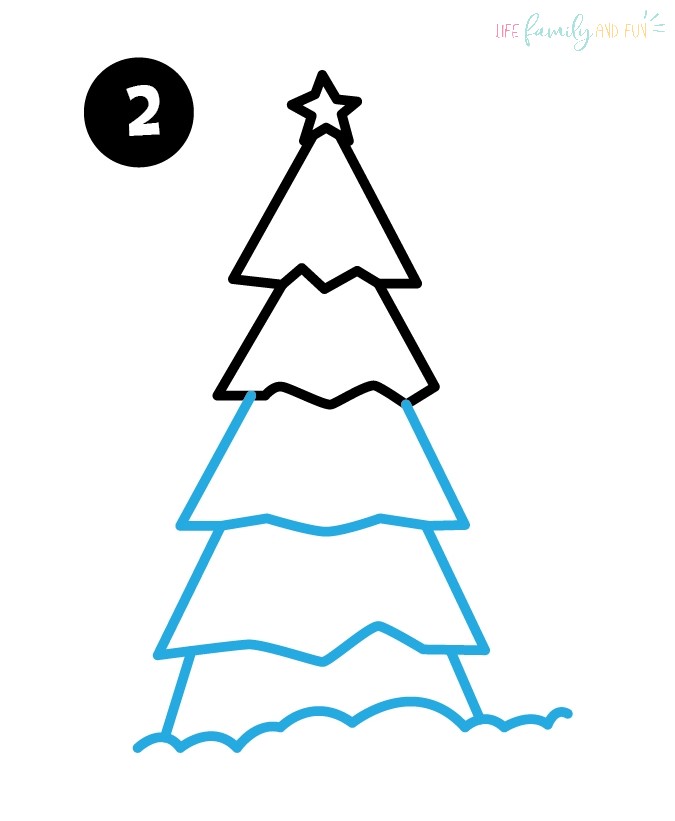
In the second step, continue to create more layers of branches on your Christmas tree by drawing slanted lines outwards at the bottom of each section, then connecting the two lines with a jagged bottom line to represent the branches facing outwards. Continue this process until your Christmas tree is as tall as you want it to be, widening the base of the tree with each section.
Draw a bumpy line across the bottom of the final section. This line indicates the snowy ground level and should look distinct from the choppy lines of the tree branches.
Step 3: Add the garlands
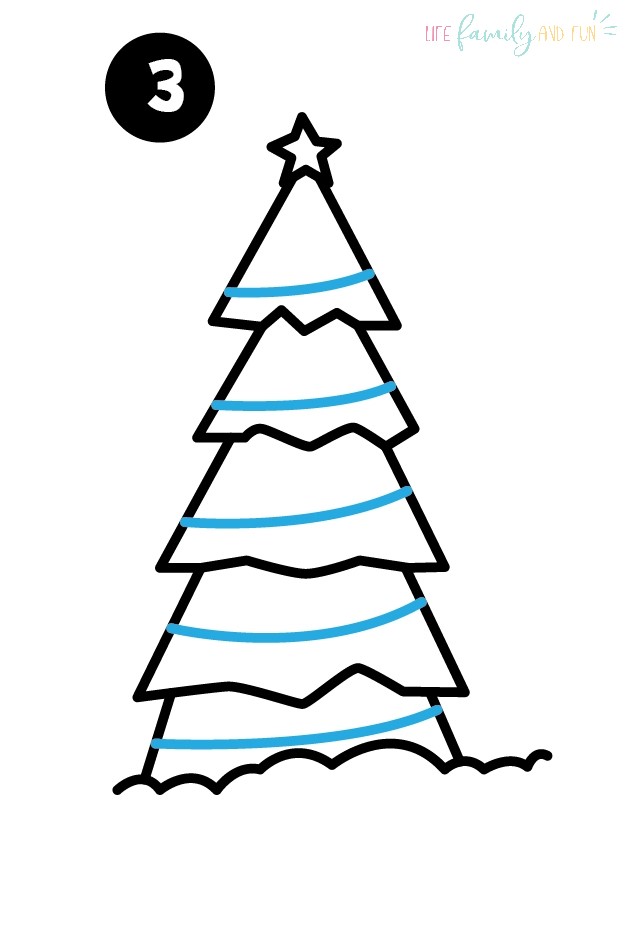
In the third step of drawing a Christmas tree, you need to add the garlands. To draw the garlands, draw a slightly curving line across each section of branches on the Christmas tree from one end of the section to the other. The lines should curve downward gently in the center as if being pulled down by gravity.
Step 4: Draw the bulb ornaments
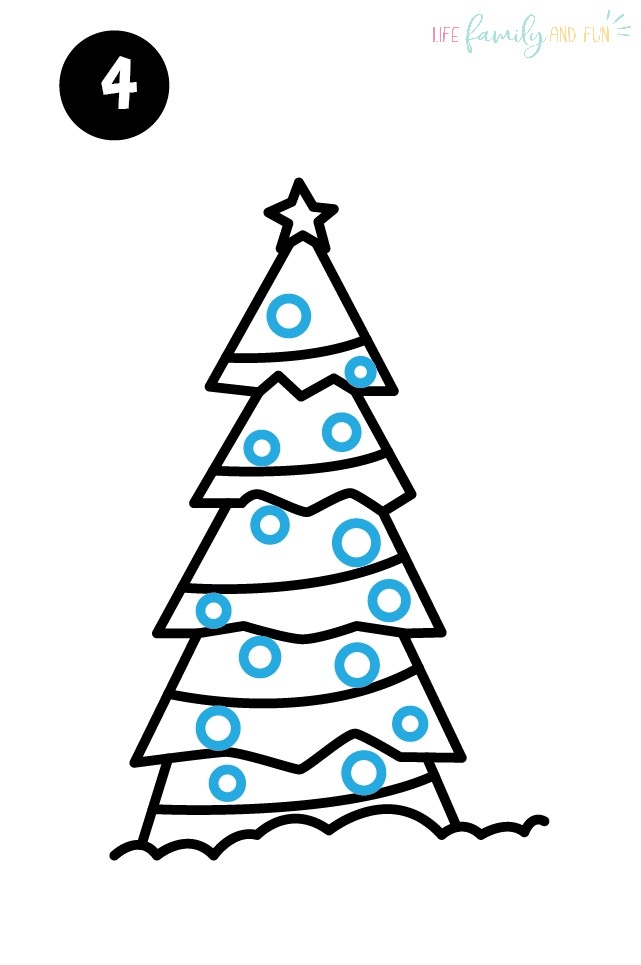
The next step in drawing your Christmas tree is to add the bulb ornaments. The easiest way to do this is to draw a series of circles on each section of your Christmas tree. You can make some of the circles bigger and some smaller to indicate the various sizes of ornaments on a real tree.
Step 5: Add a simple background
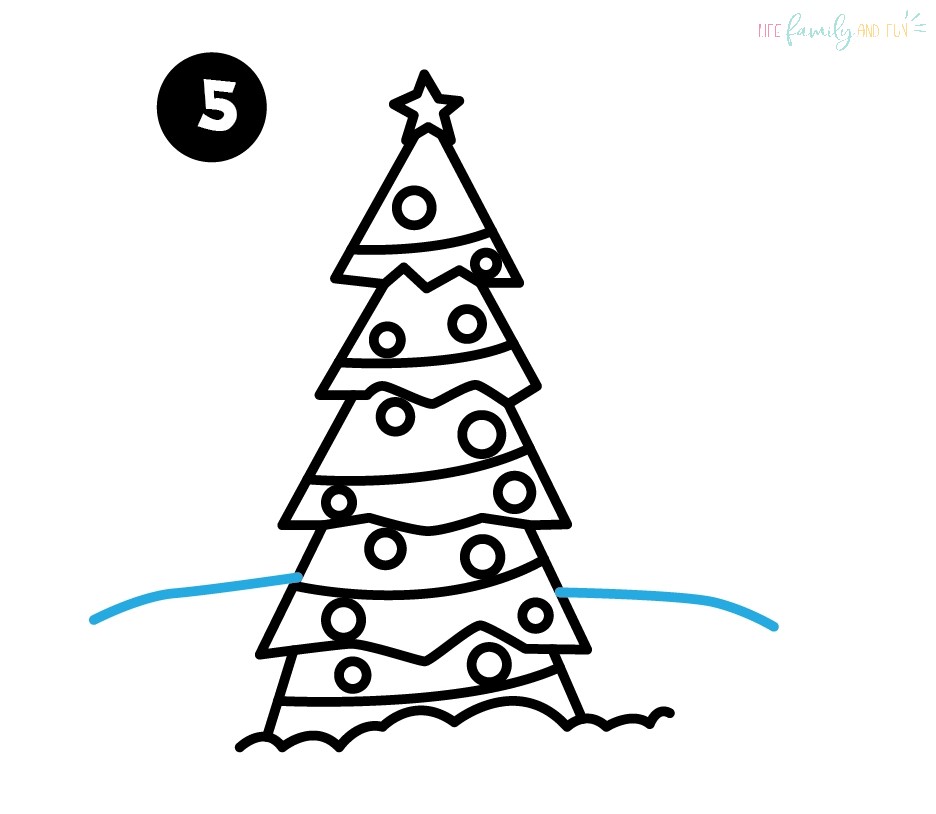
To help give the Christmas tree some scale, it helps to draw a simple background. To start the background of your Christmas tree drawing, draw a straight line across the page behind the Christmas tree about two-thirds of the way down the page. This will represent fields of snow behind your Christmas tree.
Step 6: Add a few more small trees
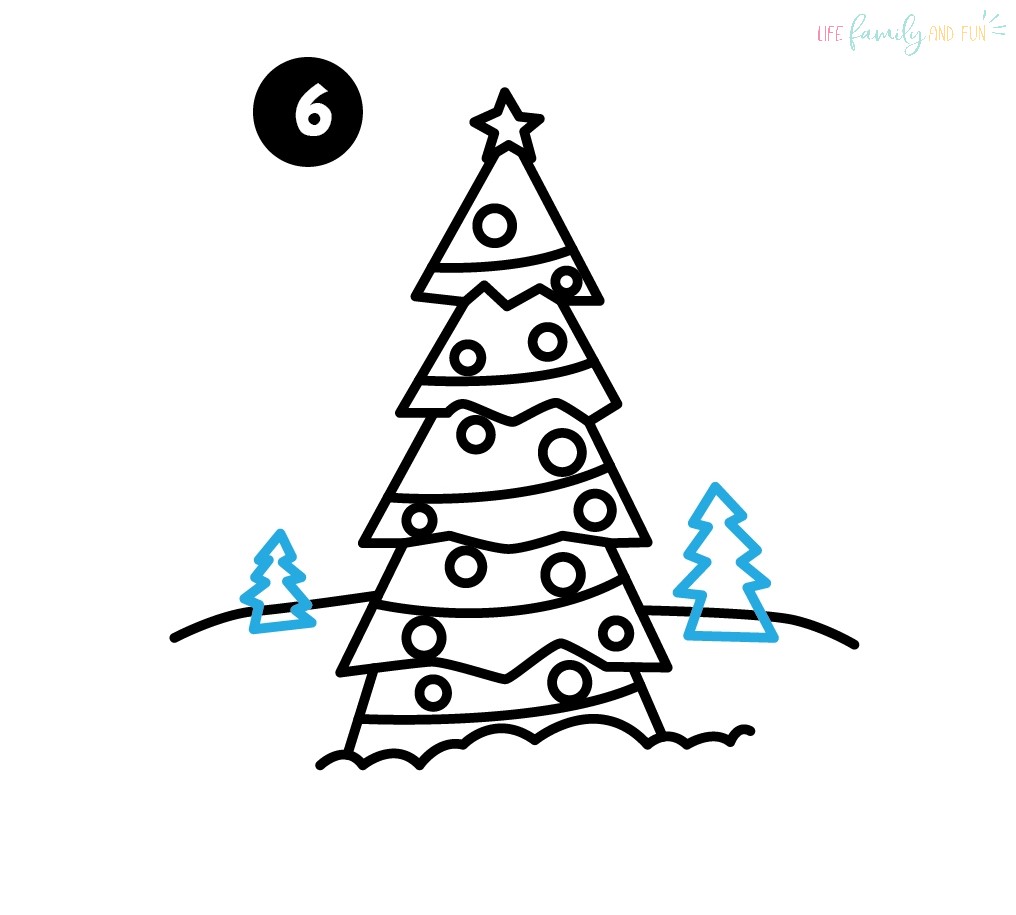
Finally, add in a few small Christmas tree silhouettes in the background of the drawing. This helps give the drawing scope and makes the bigger Christmas tree appear closer, while the smaller trees appear farther away. This artistic principle is called perspective.
Christmas Tree Drawing FAQ
What Are Christmas Tree Drawings Good For?
Christmas tree drawings can be used to design Christmas cookies, serve as the template for cutout decorations, or even act as the backdrop for Christmas-themed party games. Christmas tree draw-alongs are a useful diversion for children to keep them busy during holiday gatherings, too. The uses for drawing a Christmas tree are only limited by your imagination.
What Are Some Tips for Drawing a Good Christmas Tree?
A Christmas tree is a relatively easy holiday symbol to draw, but following some simple rules can make them much easier to pull off. Here are some tips to follow for drawing good Christmas trees:
- Keep the branches asymmetrical. Try giving your bottom lines on each section of your Christmas tree a swooping, imperfect look. This will make them look more organic and less like a clip art representation of a Christmas tree.
- Stay in the lines. If you decide to color in your drawing, keeping each color inside the lines makes the entire design look more polished. Also, try coloring in the same direction to keep the lay of the color looking neat.
What Are Additional Details You Can Add to a Christmas Tree Drawing?
The tutorial above gives you the basic rundown on how to draw a Christmas tree, but you can add more details to make your drawing of a Christmas tree even more impressive. Try including string lines on your tree instead of plain garlands by adding small ovals sporadically along each of the garland lines to represent the string light bulbs.
Another way to accent your Christmas tree drawing is to add wrapped presents at the base. To make the drawing even more complex, try sketching some simple toys such as a teddy bear or a few candy canes stuck in the snow.
This easy drawing can be completed with a wide variety of different art supplies, from colored pencils to finger paints. Try experimenting with different mediums to showcase homemade Christmas trees all over your house this holiday season.