If there’s something to love about Halloween snacks is how creative you can get with making decorative themed and spooky foods that might look creepy, but actually taste amazing.
Today, we’re going to show you a recipe that’s healthy enough for children to snack on, but also specific enough to be a part of your Halloween party: celery stick spiders.
What can I use instead of celery?
One of the greatest things about peanut butter as a snack is that it goes so well with a variety of other foods and ingredients. If you know that celery won’t be a hit and you’d rather use something else to make this recipe, you can replace the celery with bananas cut across their length, simple cereal bars with peanut butter spread across them, apple slices, and even cookie dough (handle with care, might give kids a sugar rush).
Can I use “nut free” alternatives to peanut butter?
Peanut butter, while delicious, can be replaced with a lot of other stuff if you want a nut-free alternative that’s less likely to trigger an allergy. You can use stuff like sunflower seed butter, soynut butter, coconut spread, and even pea butter. Since we’re talking Halloween treats, you could also replace the entire butter idea with some strawberry jam, as it could resemble blood and help you stay in theme.
What are some other ideas for healthy Halloween snacks for kids?
This question has almost endless answers, as you can make as many healthy Halloween snacks as the number of existing food combinations on Earth. We know that Halloween usually gives kids an excuse to come close to a sugar coma without getting into trouble, so we’re glad to see you’ve taken it upon yourself to prevent them from getting overdosed with candy. Some other ideas for healthy Halloween snacks for kids include making your own frozen banana treats and making them look like tiny ghosts on a stick, making witch sandwiches using a bunch of veggies on toast and avocado spread, preparing healthy cereal-based cookies that look like monsters, and even making tiny rolled sandwiches that look like eyes.
Equipment
Every recipe consist of two product categories: the ingredients needed and the kitchen utensils and appliances required to get the job done. In terms of utensils, here is what you’re going to need:
- A butter knife.
- A clean cutting board.
- Three small and clean bowls.
- Piping bag (you can use a regular bag and cut off the tip using a pair of scissors).
Ingredients for Halloween Snacks:
- Milk chocolate melts.
- A jar of your kid’s favorite peanut butter.
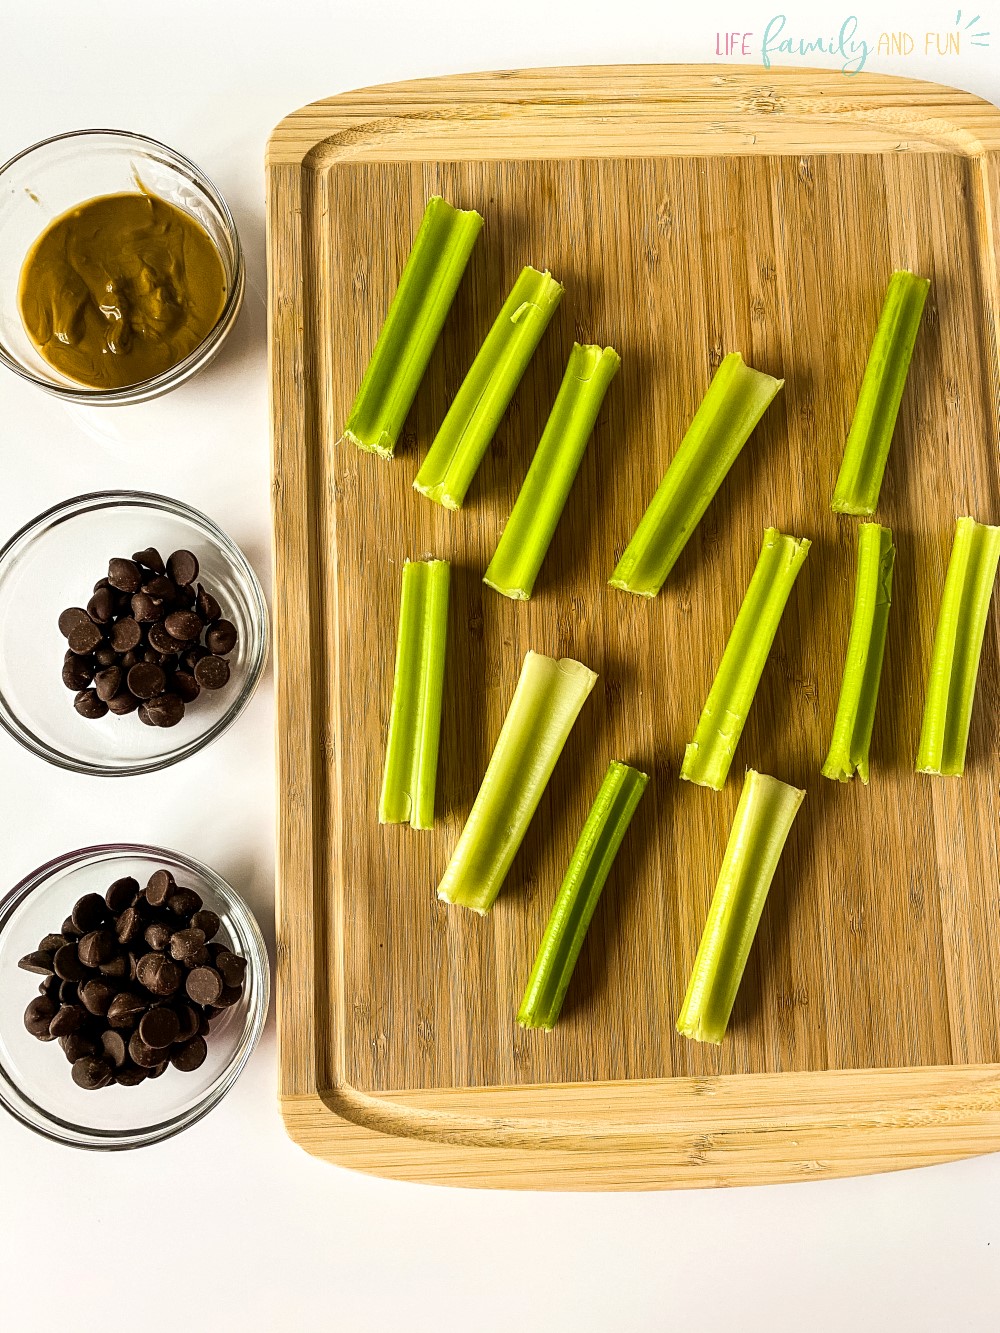
- Celery sticks cut in three or four-inch pieces.
How to prepare the Halloween Snacks for Kids
Step 1: Preparing the Ingredients
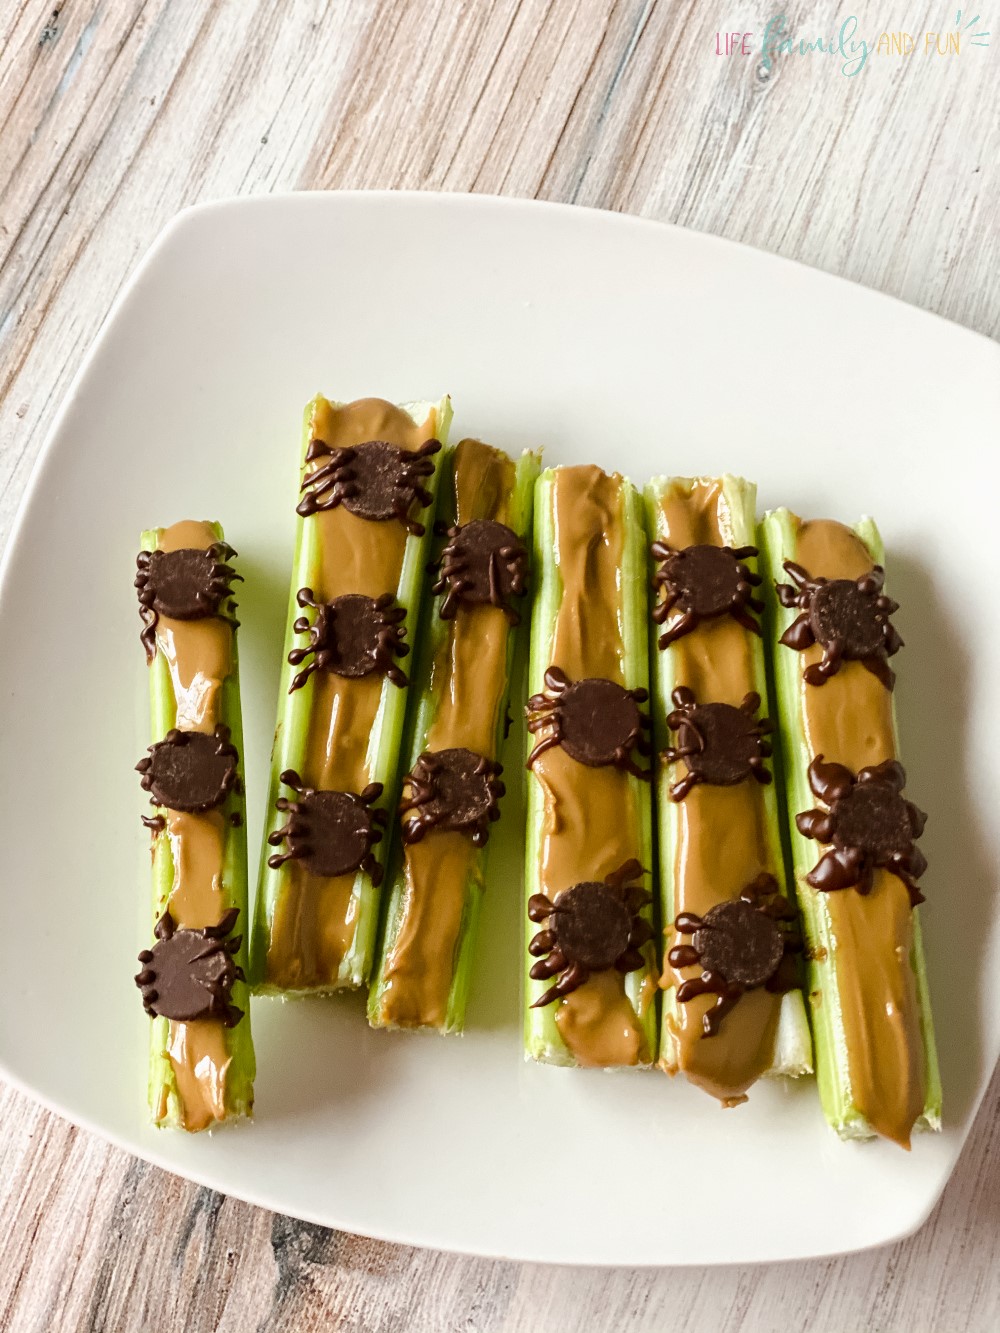
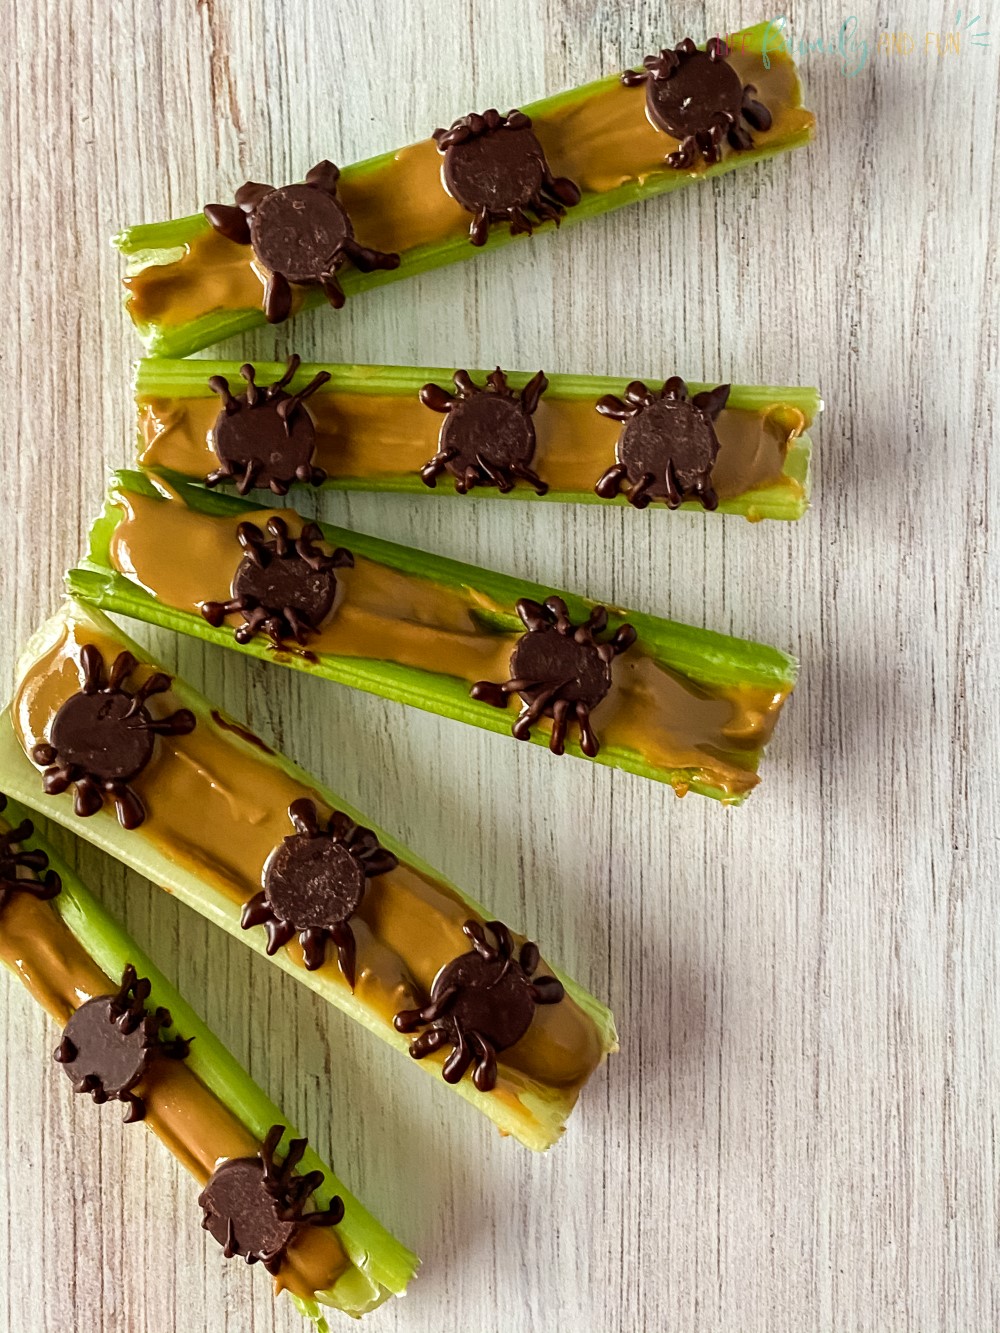
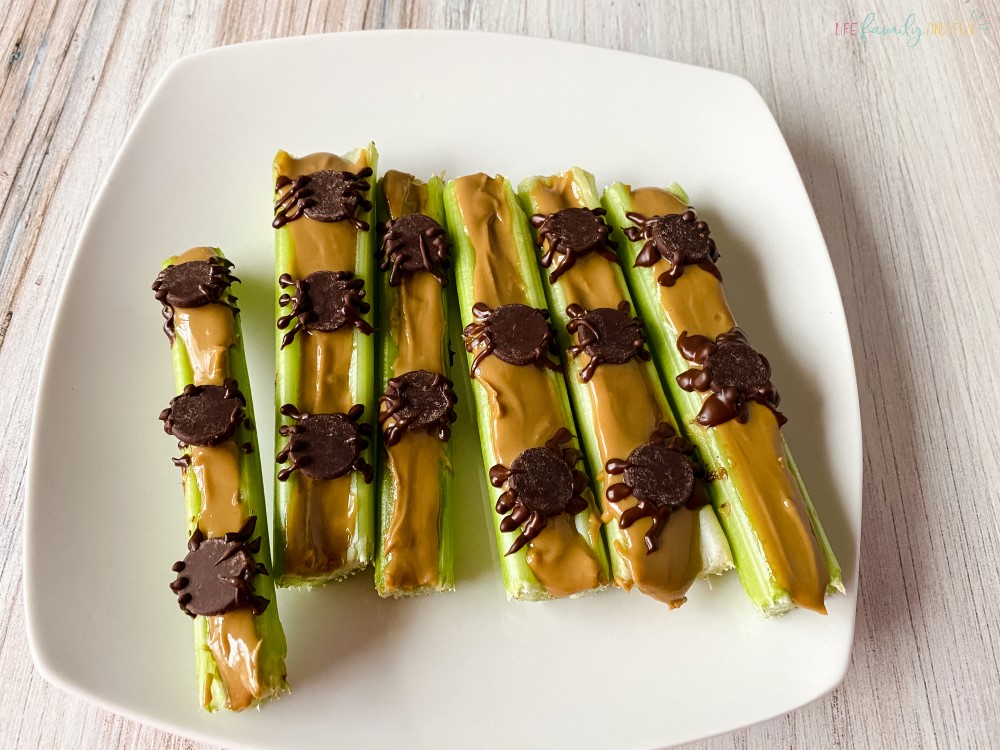
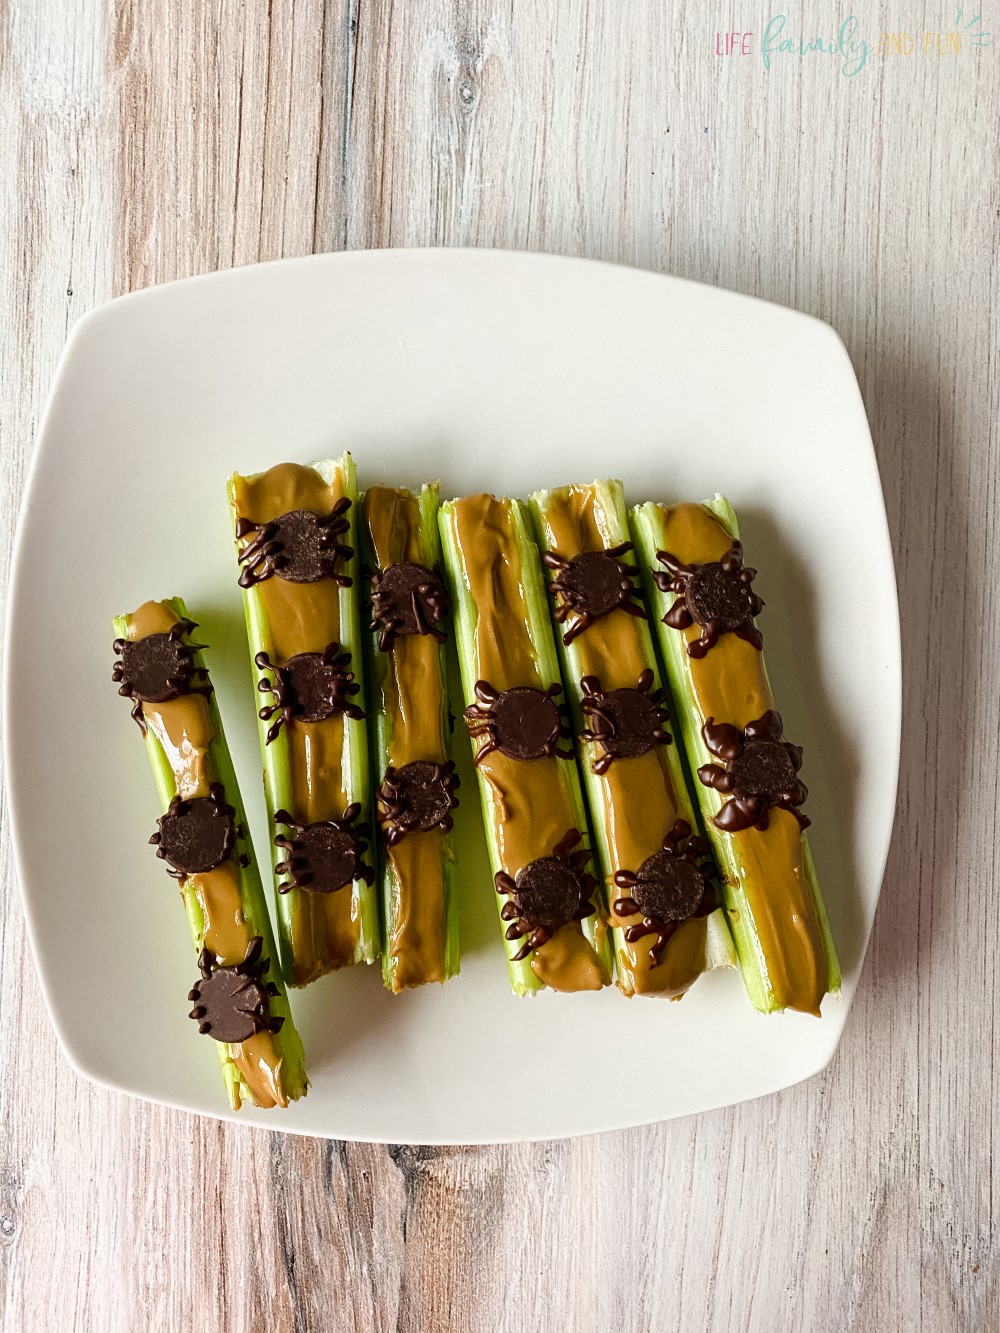
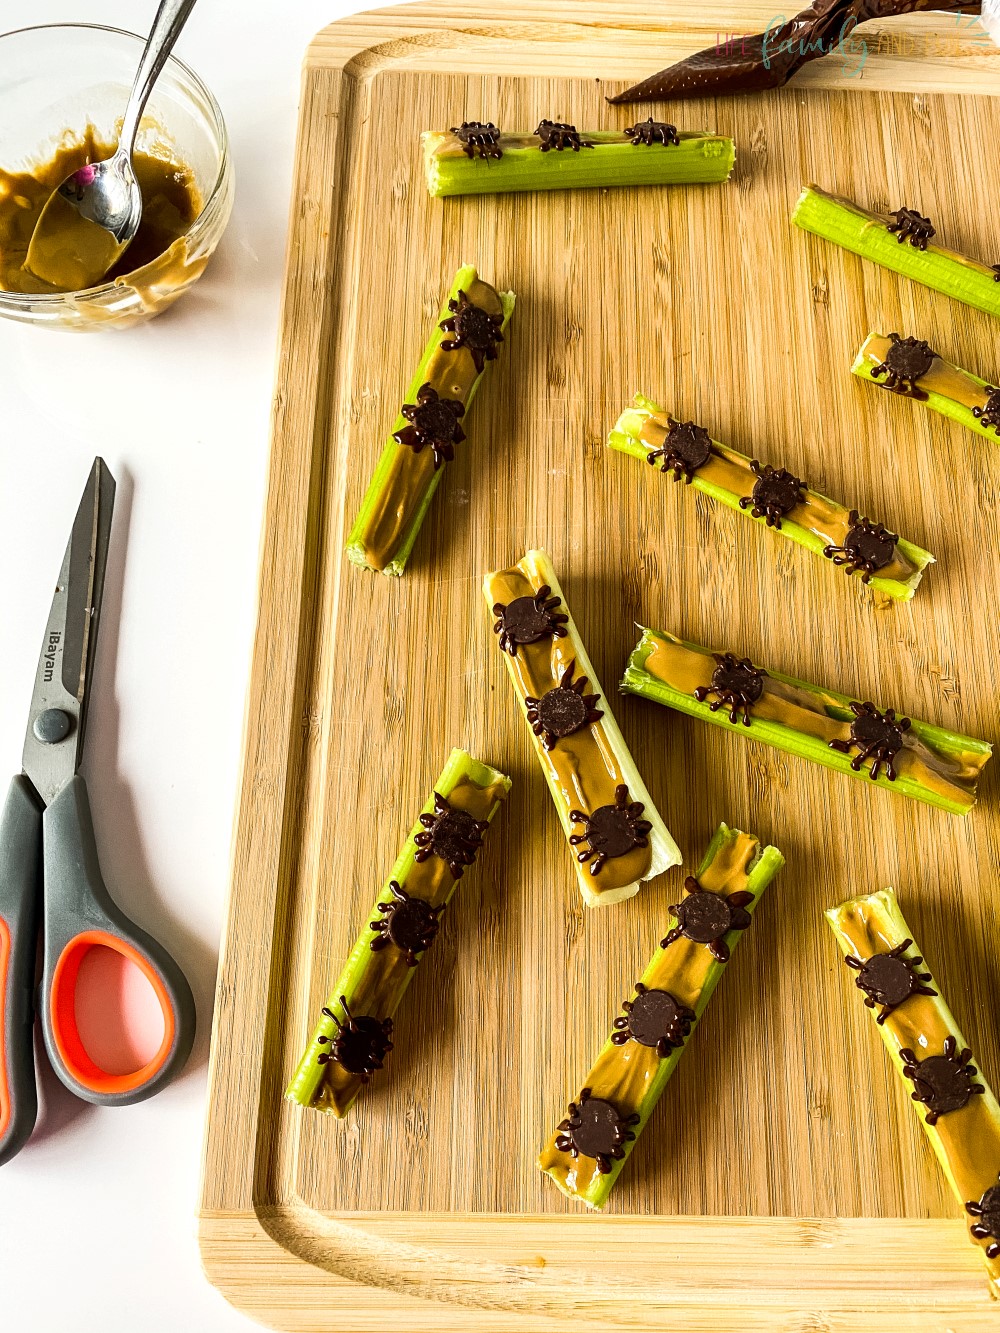
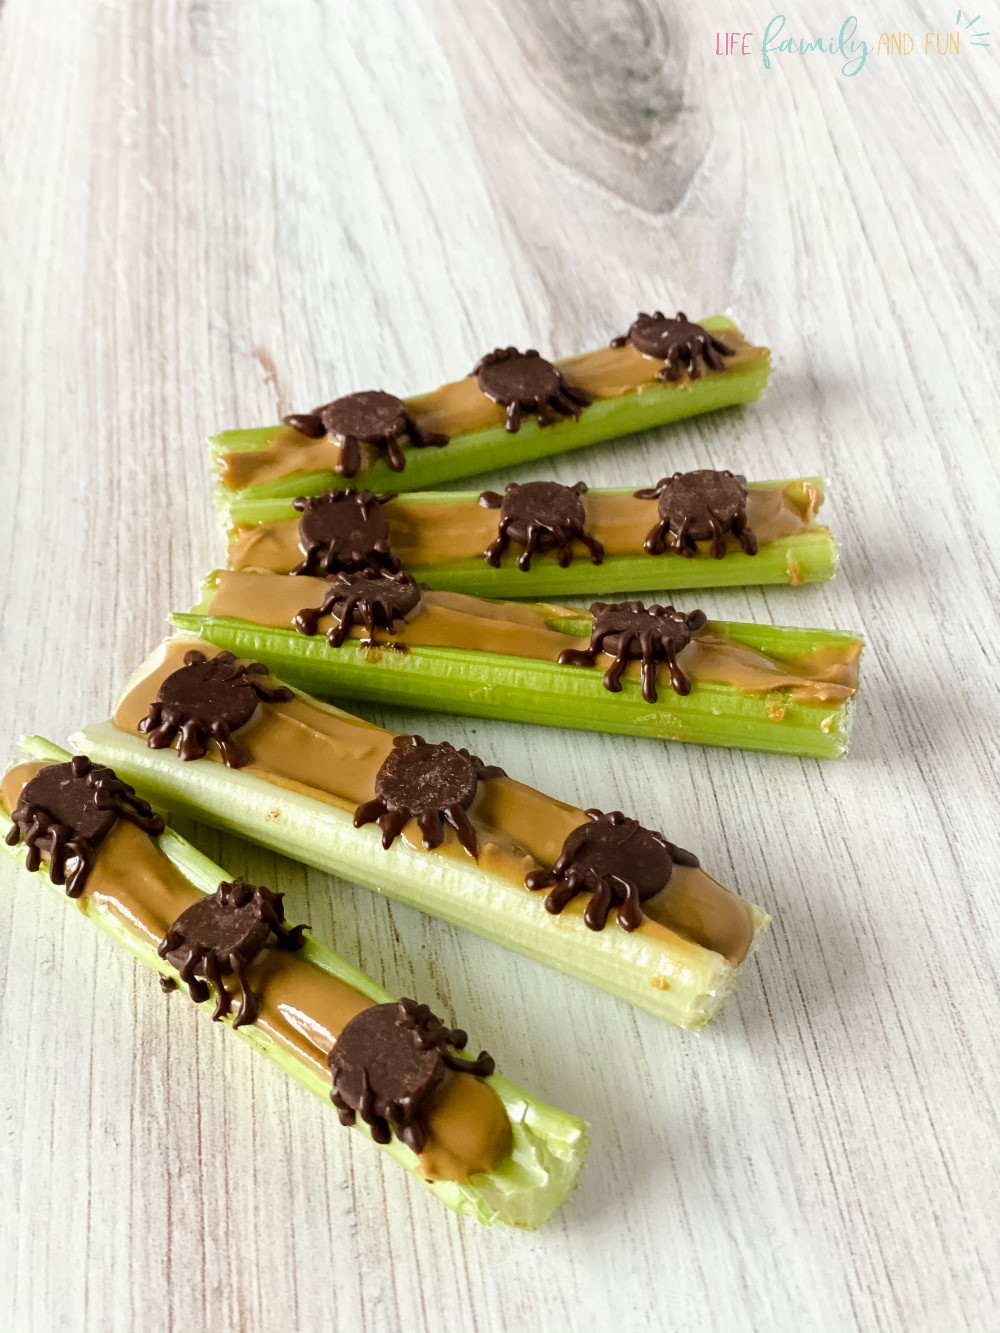
Thoroughly wash the celery sticks and cut them into pieces of the same length. Three or four inches should do the trick, because you want your kids to be able to comfortably hold them using their tiny hands. Use the three clean bowls as follows: one for putting peanut butter inside, one for holding candy melts to make the spider’s body, and actually melted candy melts to make the legs. To melt the candy melts, place them in one of the bowls and melt them inside the microwave by following the instruction on the package. Allow the melted chocolate to cool down a little bit before using it.
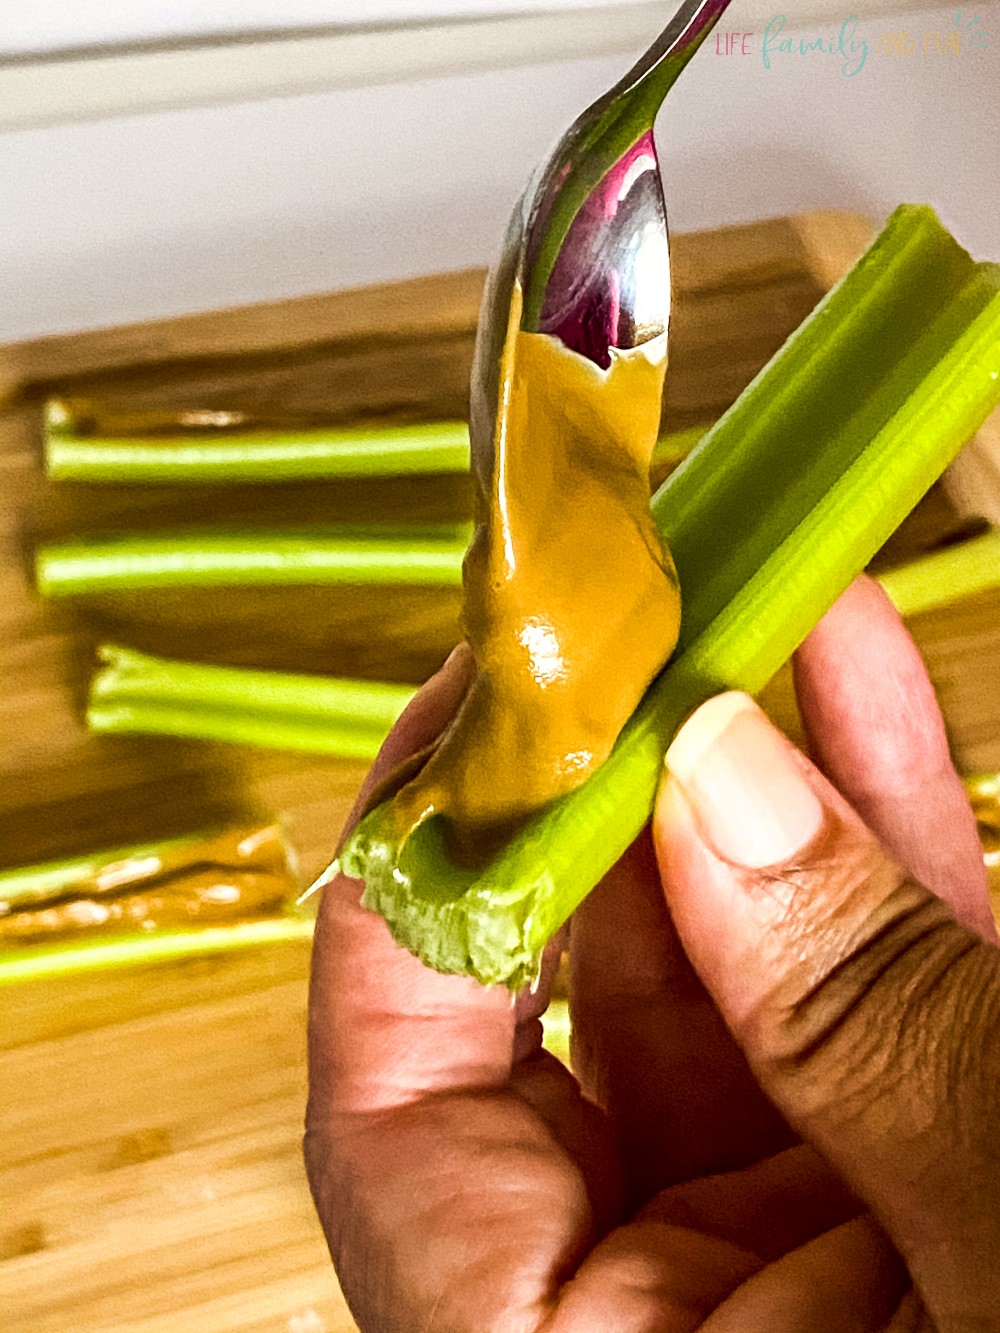
Step 2: Spreading the Butter
Grab your clean butter knife and dip it in the bowl with the peanut butter, grabbing a consistent amount using the blade. Grab a celery stick and start spreading the peanut butter on the side curved inwards. The shape will hold the peanut butter in place and prevent it from dripping over the sides. Repeat until all the celery sticks are half covered with peanut butter.
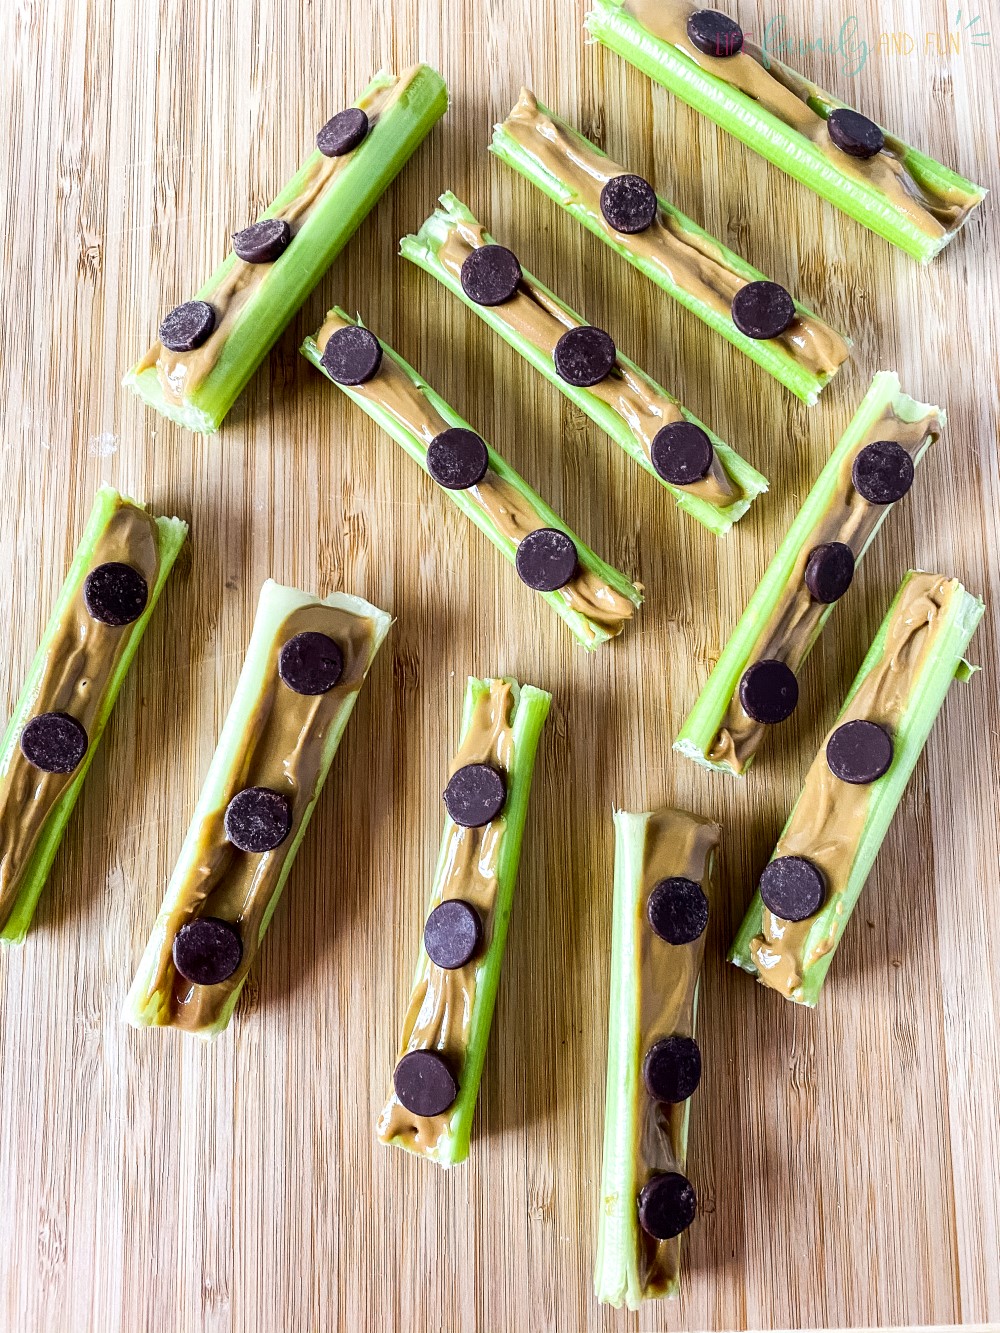
Step 3: Making the spiders
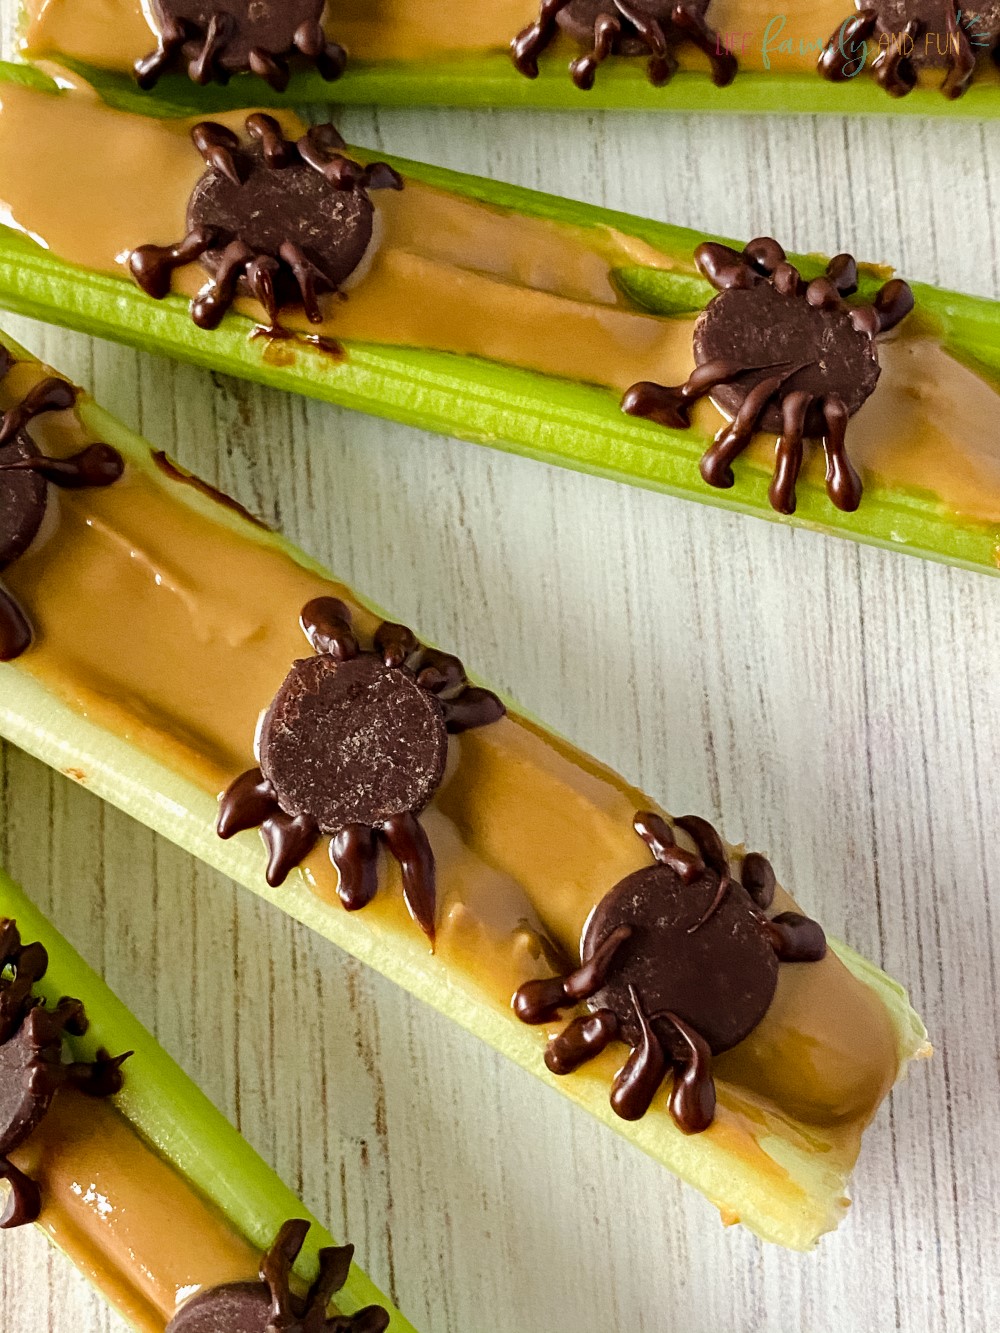
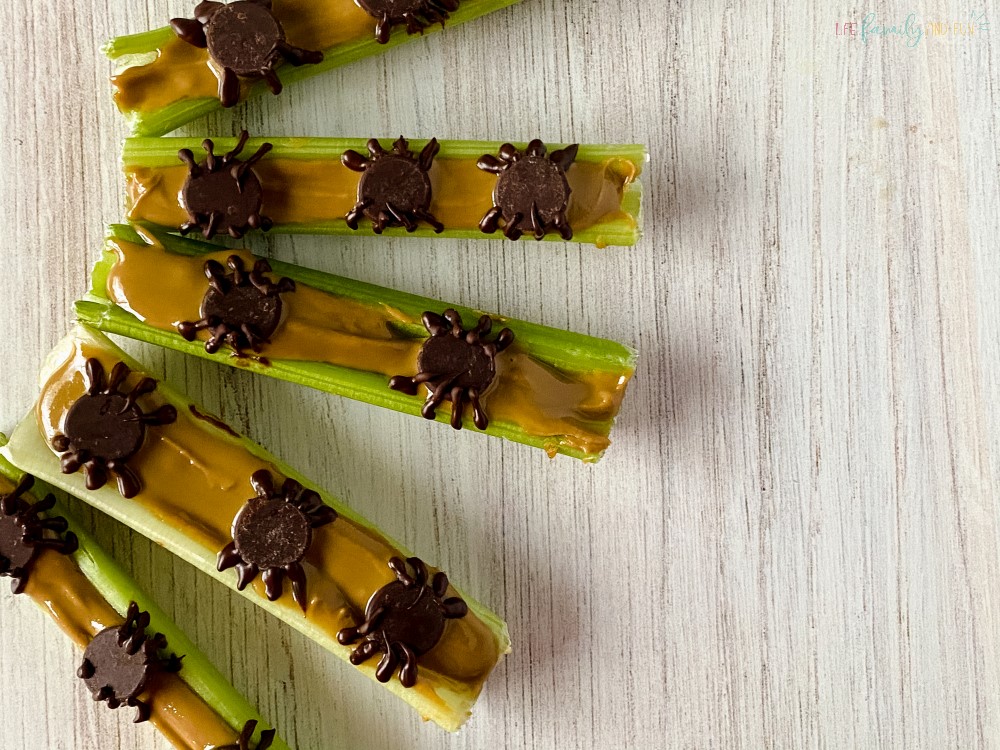
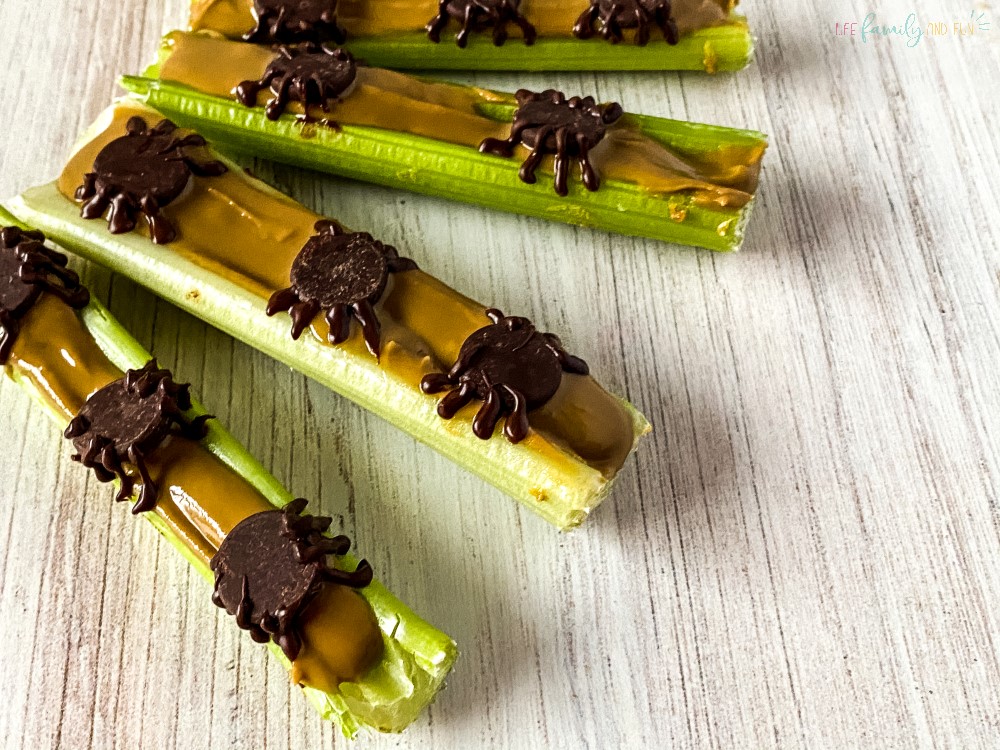
Place about three pieces of solid chocolate pieces on the celery sticks. These represent the body of the spider. Make sure that you leave enough room between each piece, as you’re going to have to add the legs next. Gently press down each piece so that it sticks to the peanut butter surface and doesn’t fall off the second you put it down.
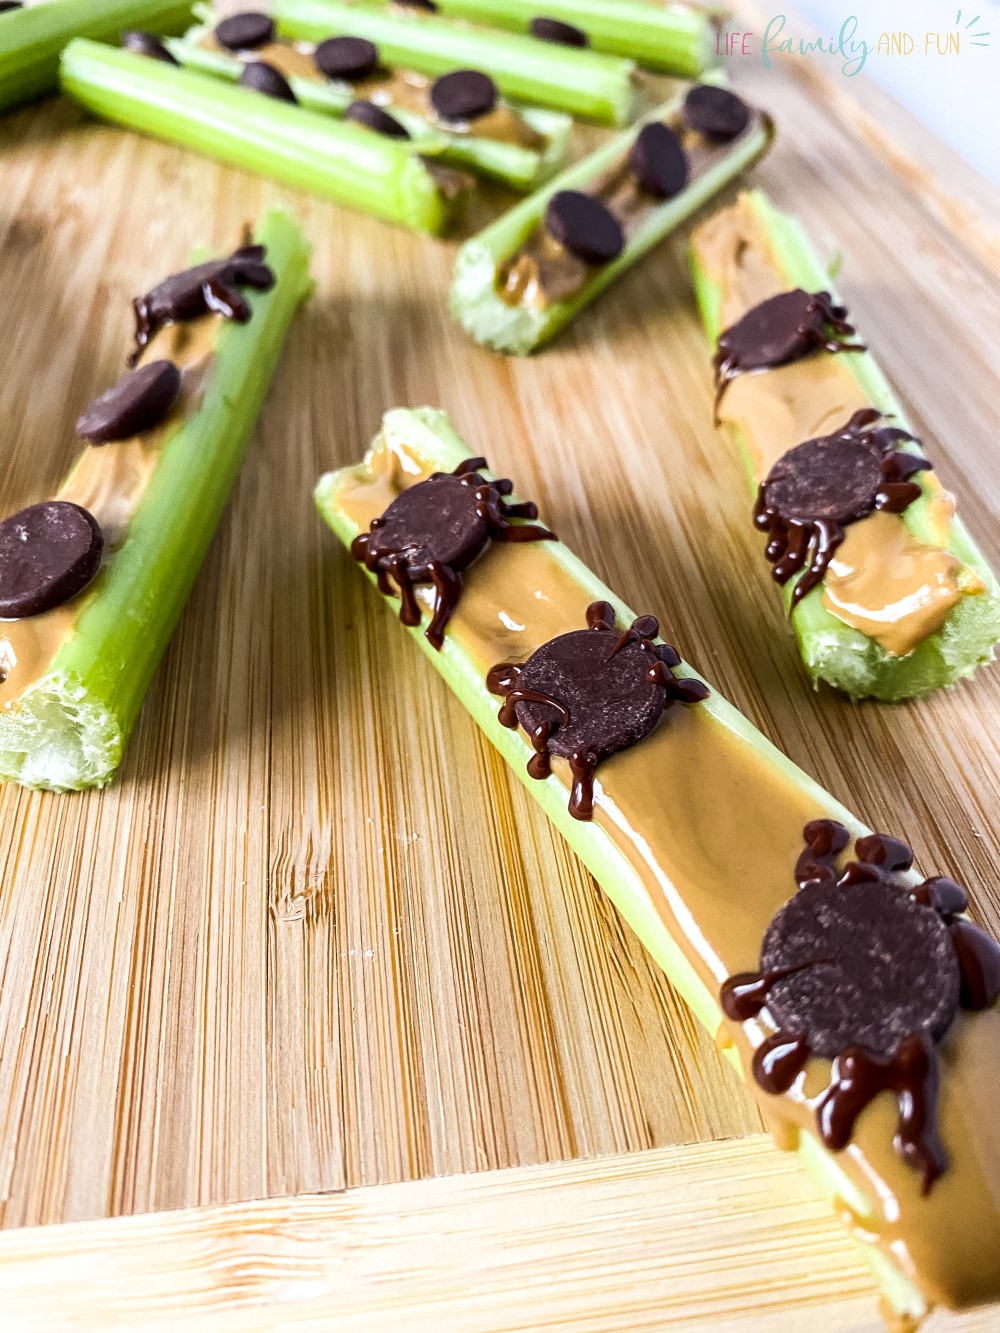
Grab your piping bag (if you’re using just a regular food bag, don’t forget to use a pair of scissors to cut one of the corners to turn this into a piping bag) and add some of the melted chocolate once it had the chance to cool off for a bit. Grab a celery stick and draw four legs on each side of the chocolate piece. Every spider should have eight legs, four on each side.
When you’re done, your peanut butter spider celery snack should look something like this:
That about covers it! If you want, you can leave this snack in the fridge for about an hour so that every gooey ingredient solidifies and your kids can enjoy the treats without getting chocolate and peanut butter all over the place.