To draw a person, learning how to draw hair is crucial. Hair gives a character that you are drawing personality and identity. Eyes and facial expressions can do the same, but hair comes in even more shapes and sizes.
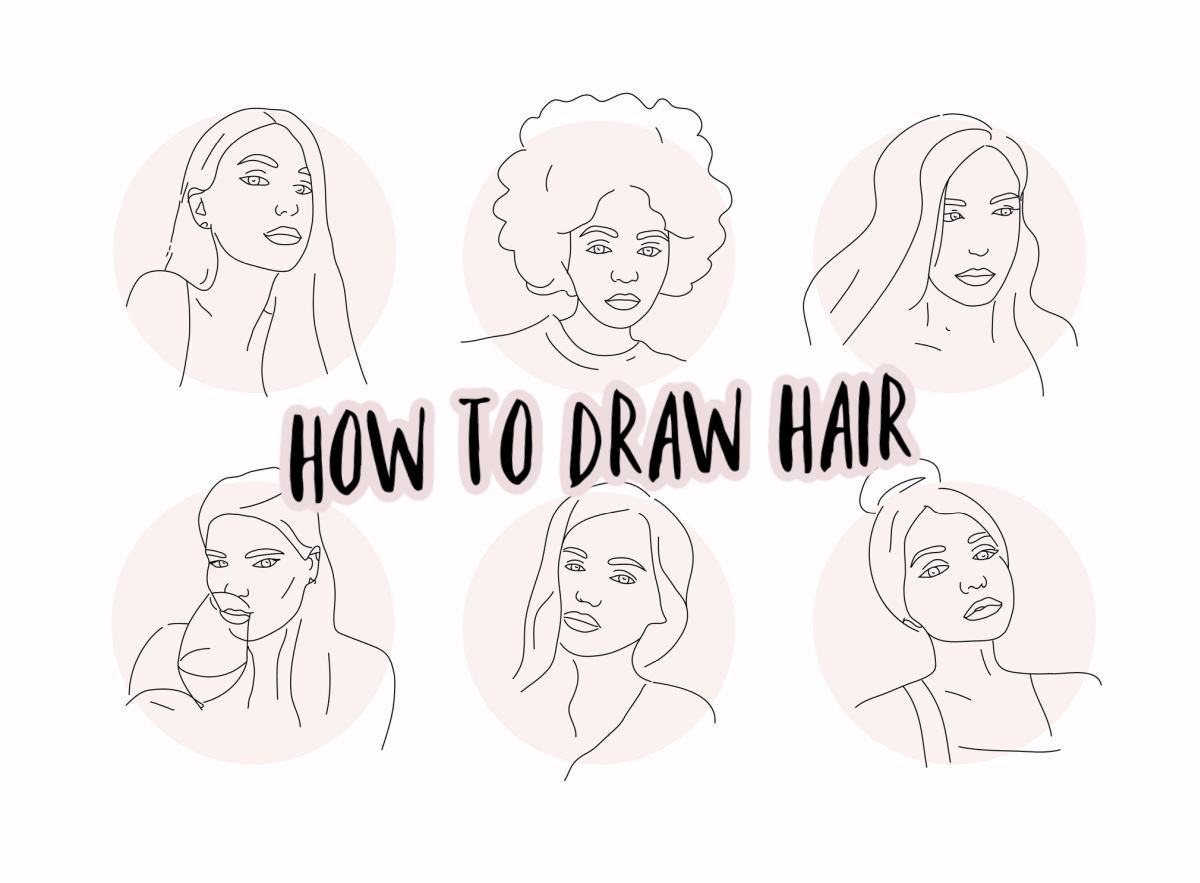
Supplies Needed For Drawing Hair
Before you begin learning how to draw hair, you need supplies. While professional artists have various supplies to use for drawing hair, you can start with the basics.
- Paper – sketch pad paper or drawing paper is better than office paper
- Pencils – grade B or 2B are good for drawing hair
- Eraser – an eraser is for more than erasing mistakes
- Blending Tools – a blending stump or blending tortillon will help add depth
Different Hair Styles To Draw
Every head of hair is different in real life, so they should be on paper too. While there are dozens of ways to learn how to draw hair, it’s best to start with the basics.
- Curly
- Kinky
- Straight
- Braids
- Buns
15 How To Draw Hair: Easy Drawing Projects
Whenever you are drawing hair, it needs to match the style of art you are using. Anime hair and realistic hair are different. Pick your favorite art style and follow one of these simple drawing project tutorials on how to draw hair.
Male Anime Hair
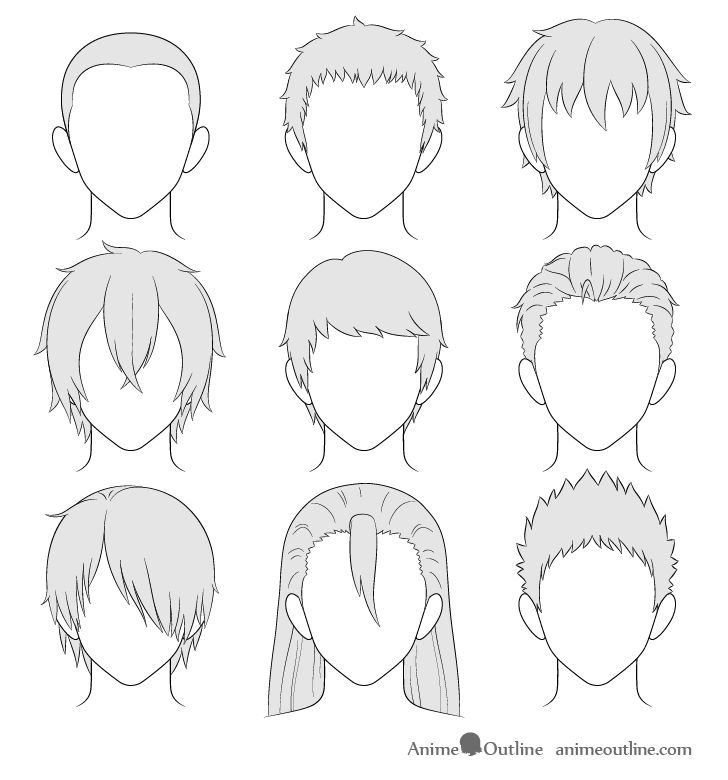
Male anime hair is simple and easy to draw. Anime Outline has a guide on how to draw the most popular male hairstyles in anime.
Female Anime Hair
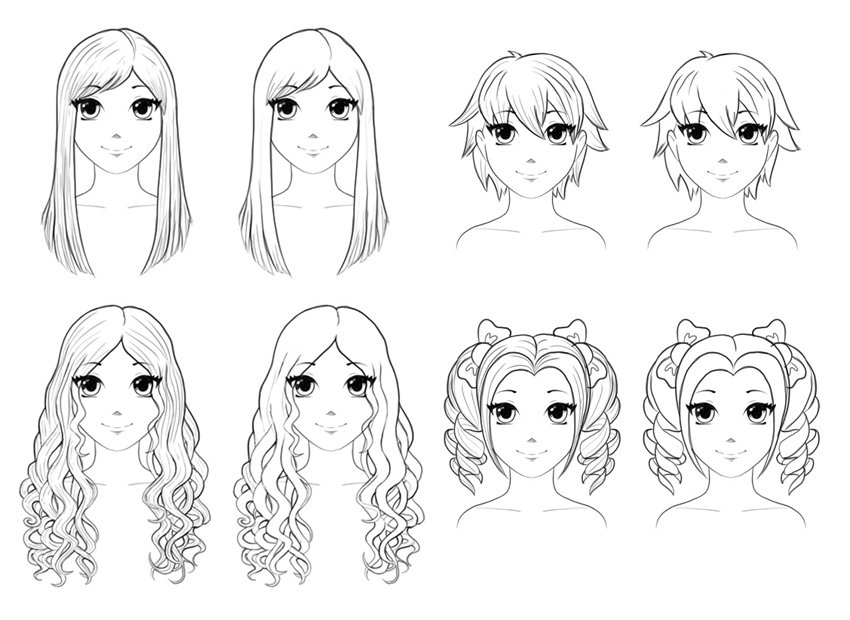
This tutorial on Envato Tuts shows you how to draw different styles of female anime hair. After you master them, you can move on to complex anime hairstyles.
Realistic Male Hair
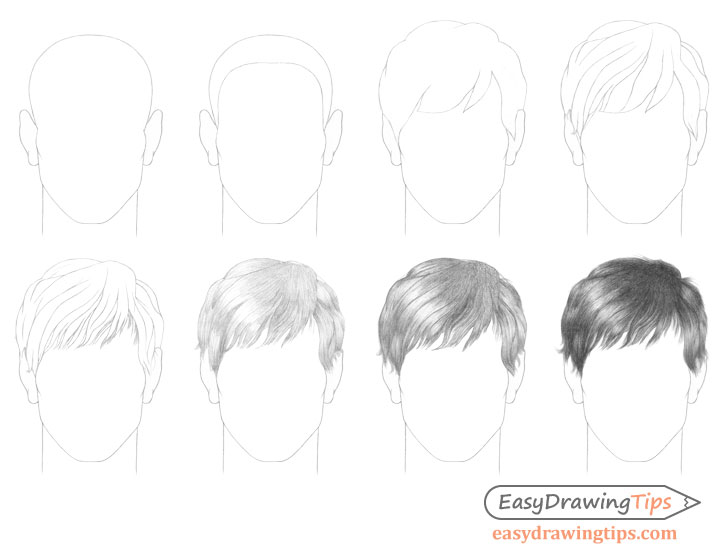
Realistic hair is difficult to draw. But Easy Drawing Tips makes drawing realistic hair look easy with their step-by-step guide.
Realistic Female Hair
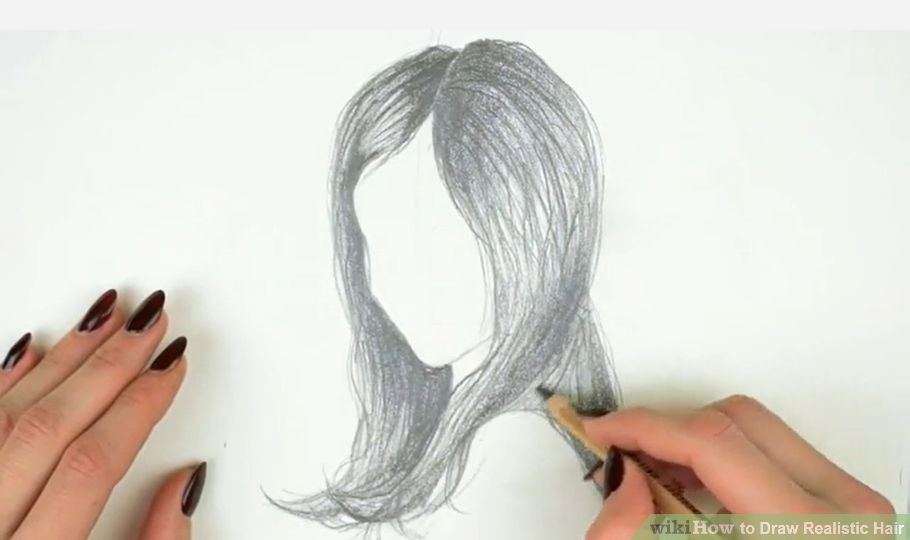
Realistic female hair can be beautiful if done right. Wiki How has a simple tutorial on how to draw realistic long hair that can help you get started.
How to Draw Cartoon Hair
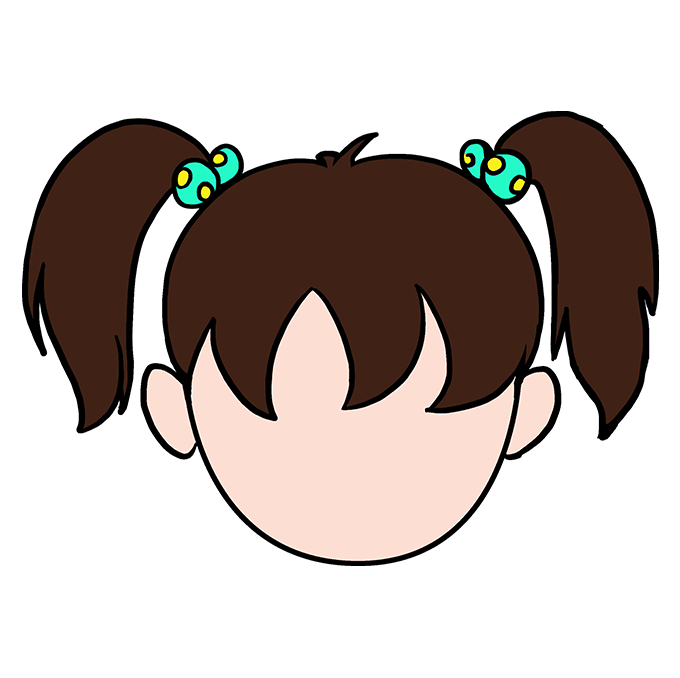
Cartoon hair is versatile and yet easy to draw. Easy Drawing Guides has a simple tutorial on how to draw cartoon hair that can be applied to other styles.
How to Draw Pigtails
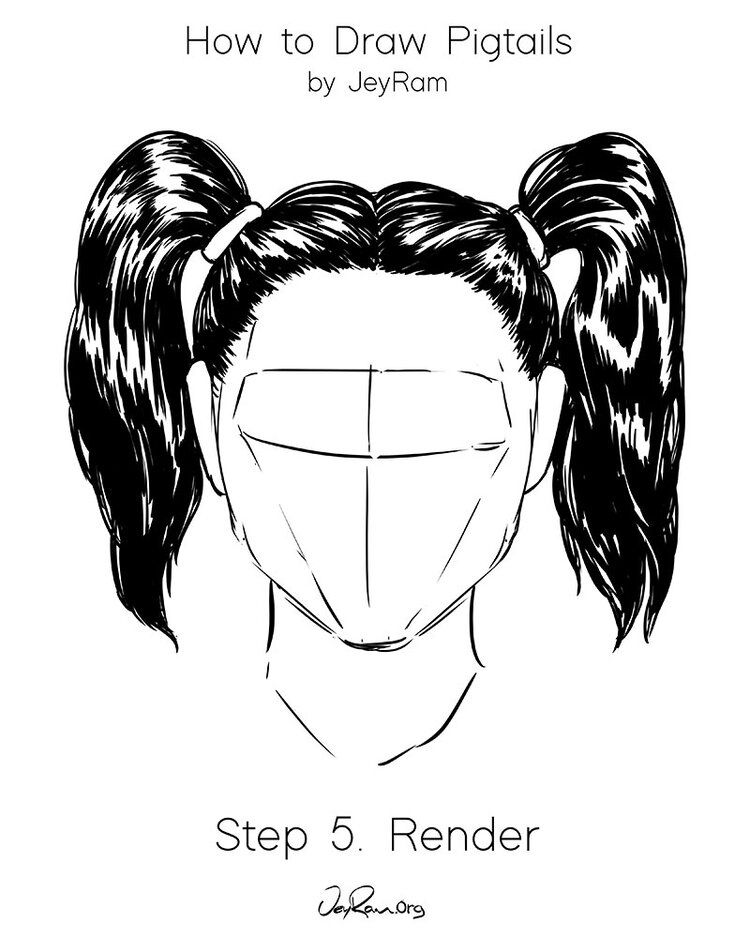
Pigtails are easy to draw once you learn how the hair leading up to and spouting out of the hair tie should lay. Jey Ram’s guide on pigtails gets straight to the point.
How to Draw Ponytails
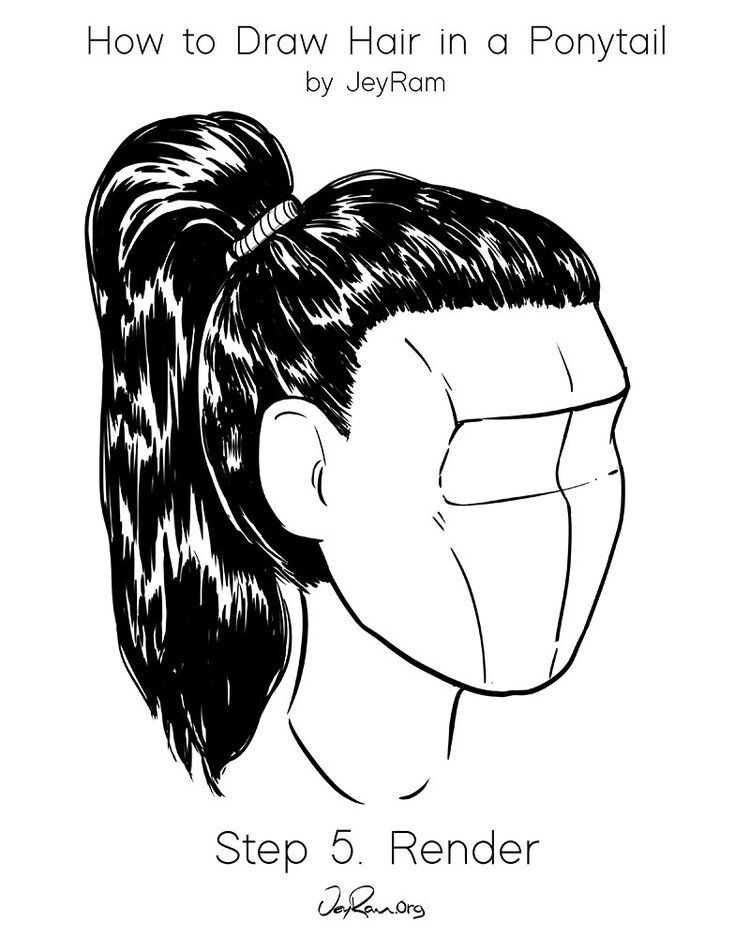
Drawing a ponytail shouldn’t be a problem if you can draw pigtails. Jey Ram strikes again with a great tutorial. This time, it’s on how to draw a ponytail.
How to Draw Braids
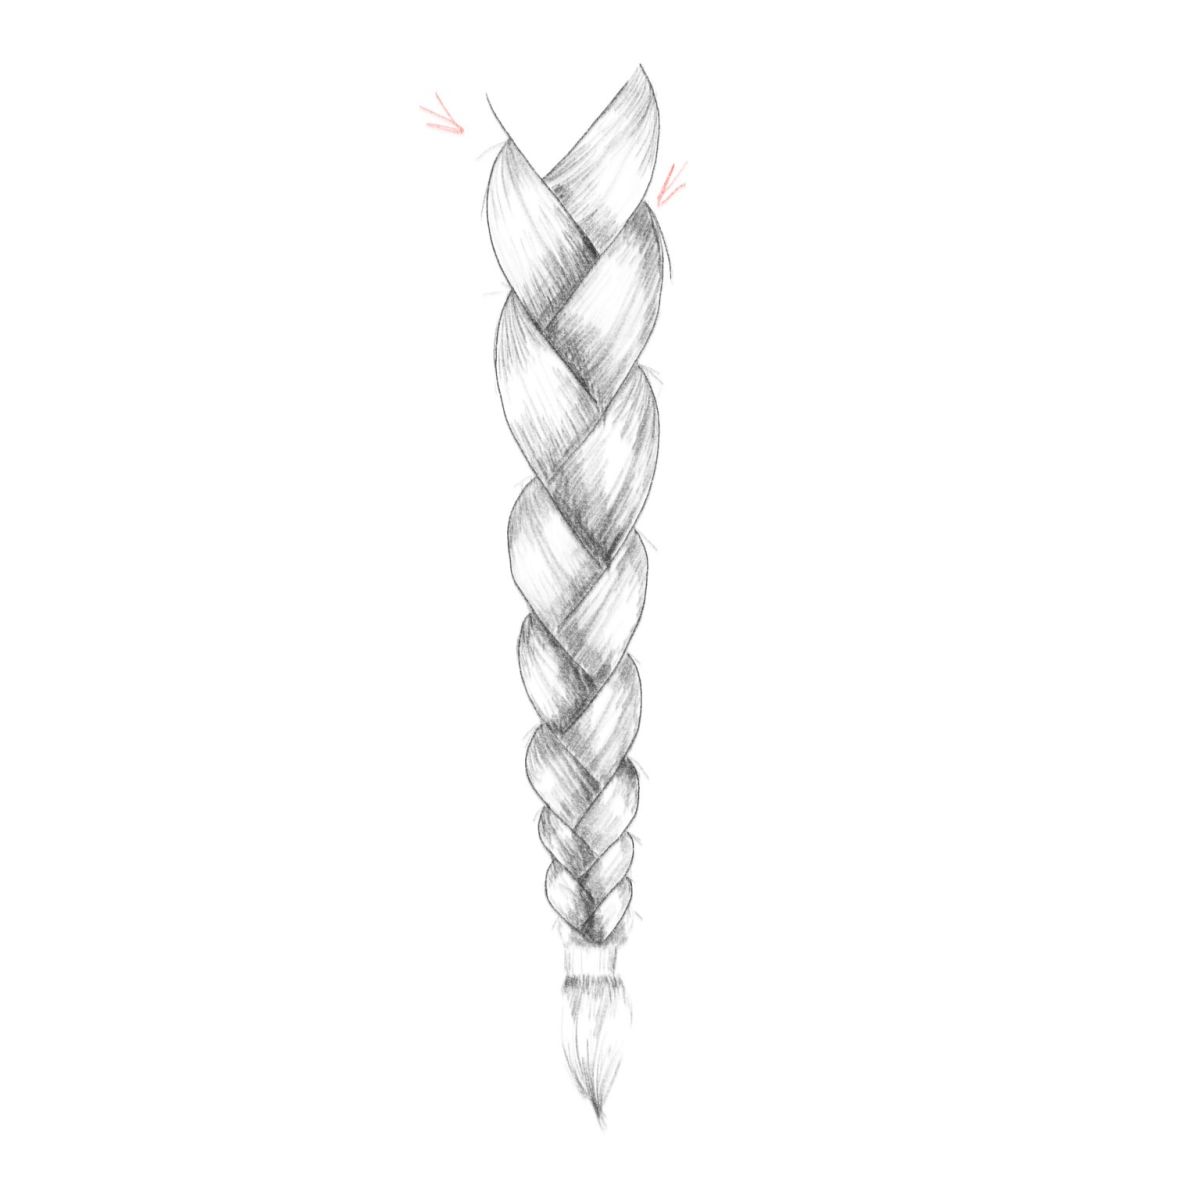
Braids are one of the easiest hairstyles in real life, but one that takes practice to master in the art world. This braid tutorial by Wonder Street is one that you may want to bookmark.
How to Draw Facial Hair
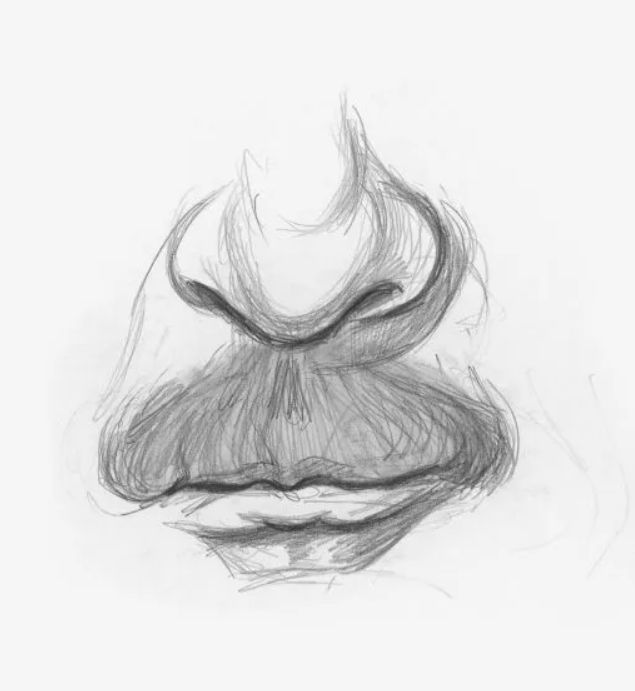
Facial hair doesn’t lay the same as head hair. Artist’s Network teaches you how to draw a mustache; the same rules apply to all facial hair.
How to Draw a Bun
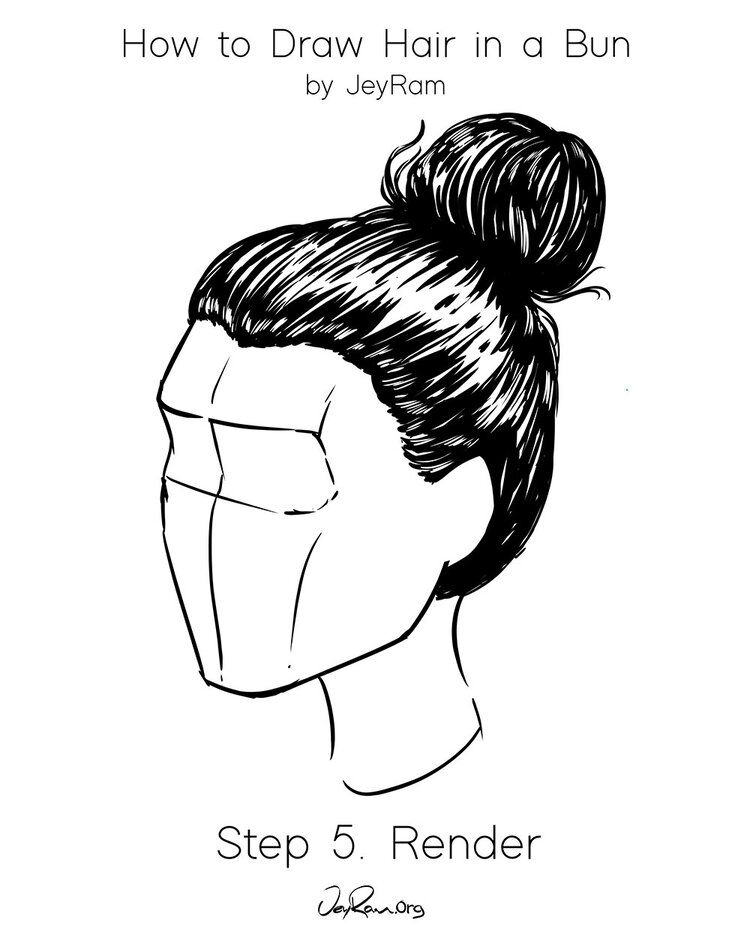
To draw a bun, you need to start by drawing a ponytail but finish it in a different way. Jey Ram’s tutorial is a good one for beginners and intermediates.
How to Draw African-American Hair
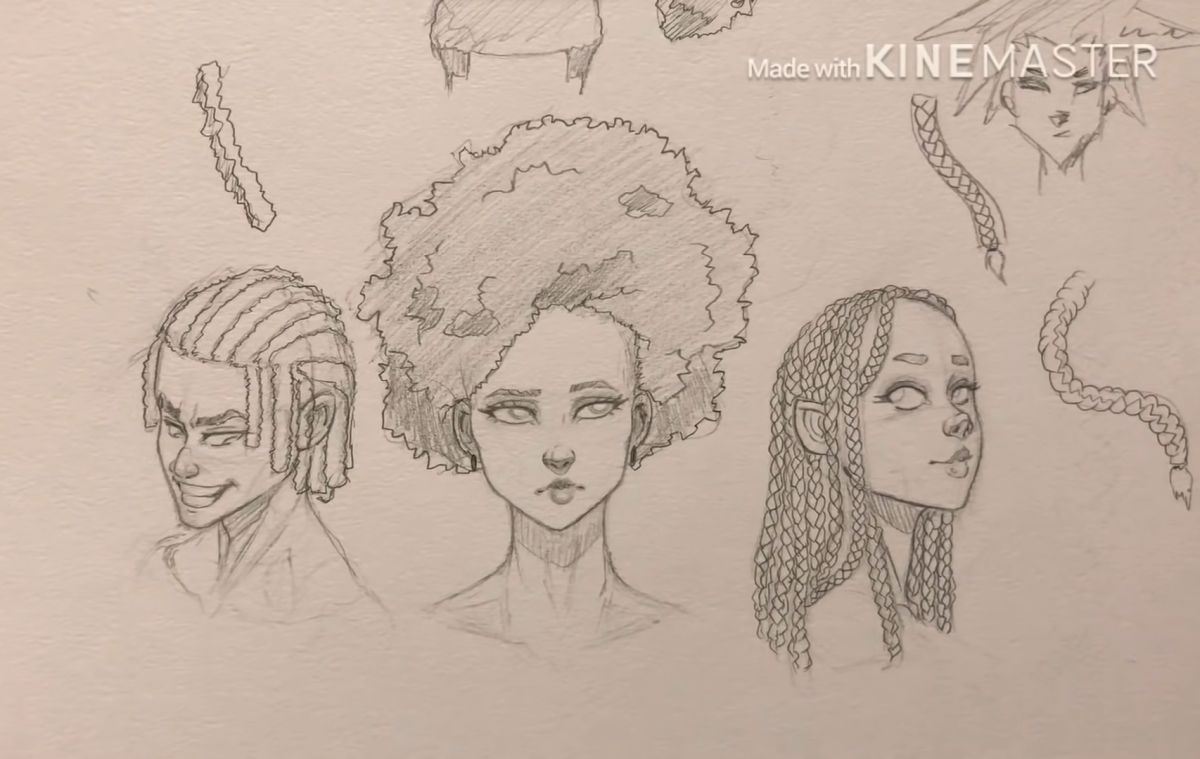
Hairstyles in the 4A range and beyond are not easy to draw. It’s AJ Art explains how to draw this type of hair in his video tutorial.
How to Draw Hair Under a Hat
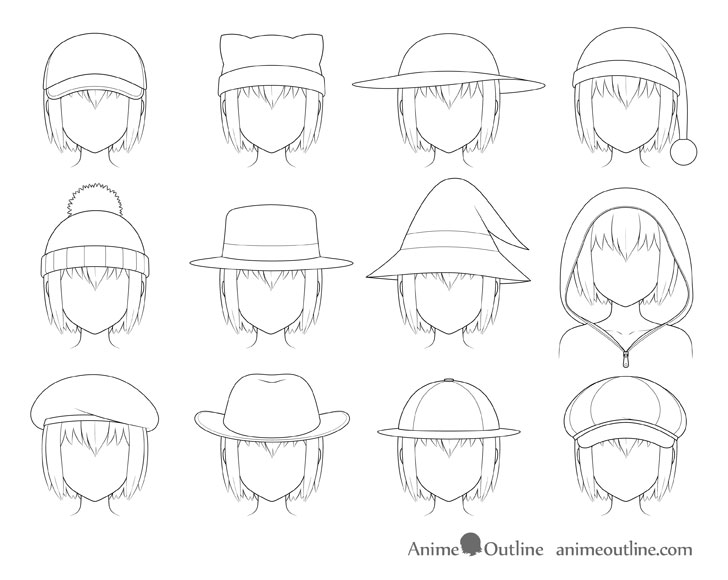
If you want to draw a hat on your character, look at how anime character hats are drawn. Anime Outline has a nice tutorial on how to draw hats on hair.
-
How to Draw Shaved Head or Stubble
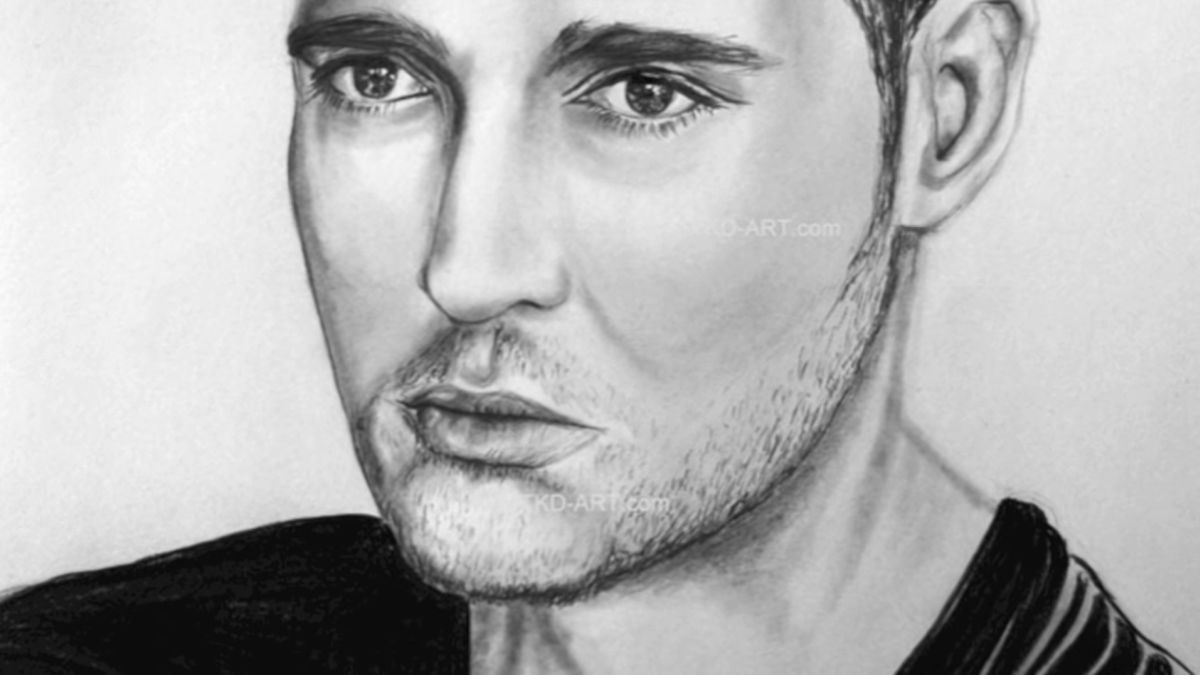
A stubble tutorial can be applied to a shaved head. Jonny J Atter Art has a pencil art tutorial that shows how to draw stubble.
How to Draw Hair Texture
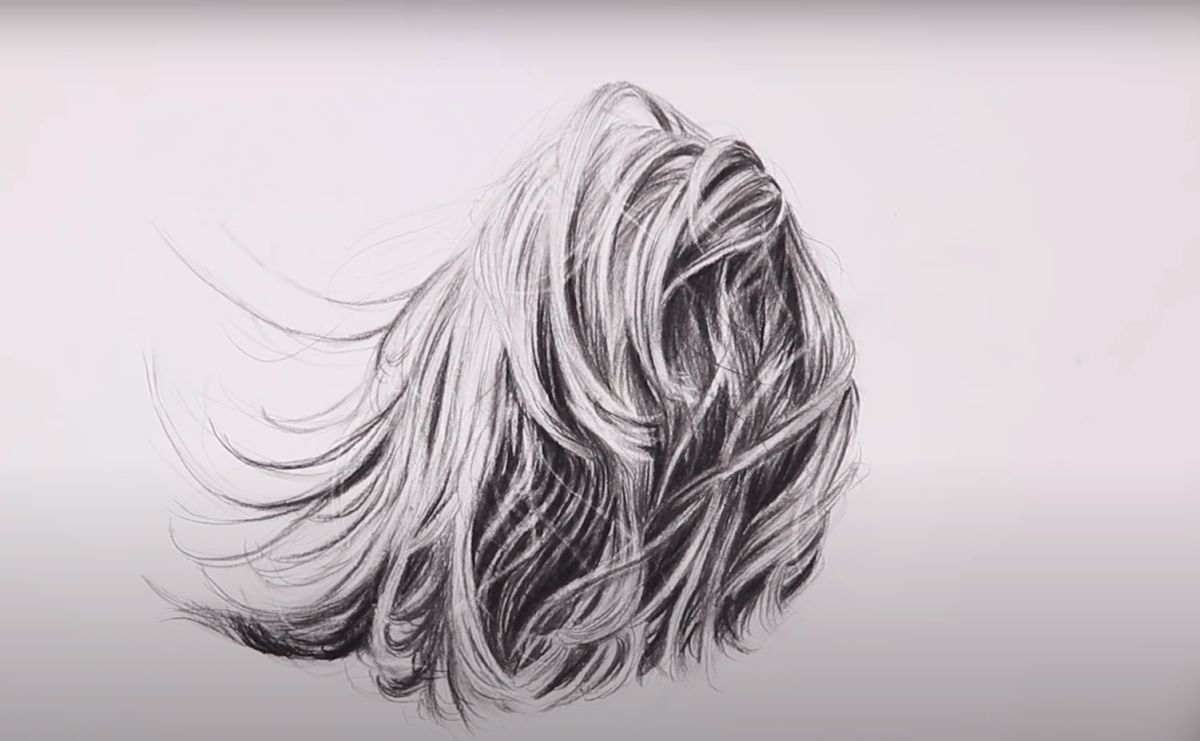
Hair texture can be confusing to draw. Kirsty Partridge Art has an in-depth video tutorial that can help you get the details right.
How to Draw Anime Hair Chibi Style
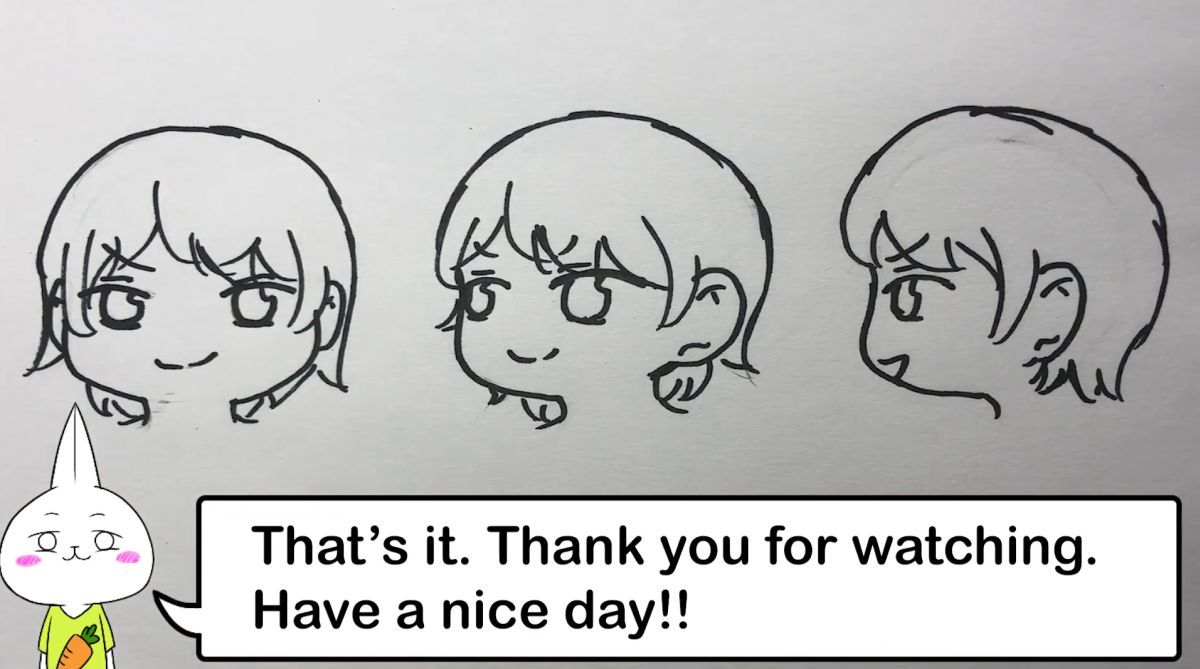
Chibi anime hair is similar to regular anime hair but with a cute and tiny frame.
Usa-kun’s Manga & Anime Art Lab’s video tutorial will take you through the steps to draw your first chibi character’s hair.
To Draw Realistic Hair Step-By-Step
Realistic hair is the most impressive hair to draw. It’s also the most difficult to draw. Every artist takes into account the features and steps required to draw realistic hair.
Realistic Hair Features
Though there are countless features of drawing realistic hair, most of them fall under one of these four categories.
Volume
All hair has volume; the amount of volume each head of hair has is different. Volume should be added from the start and kept throughout the process of drawing hair.
Flow
Flow refers to the way that the hair lays. Look at a few people in real life and see how each strand of hair falls.
Shadows And Highlights
Shadows and highlights are difficult to master. They require a lot of practice in realistic hair because you’re trying to capture how the light hits a 3D object.
Texture
Texture is one of the easiest things to learn when it comes to drawing realistic hair. Because each hair can be drawn separately, you can take your time when just starting out.
How to Draw Realistic Hair Steps
Step 1 – Add Volume
The first thing you should do when drawing realistic hair is to create the head and then add a heightened area around it. Hair doesn’t lay flat on the scalp but grows up and out.
Step 2 – Create a Part
You can draw a side or middle part, but now is the time to choose. You don’t need to draw it in bold, but you should mark where you want it, as it will guide everything from here.
Step 3 – Frame the Face
Draw a few strands of hair around the face and mark where you want bangs. You don’t need to add bangs, but any hair touching the face needs to be marked.
Step 4 – Create a Flow
You only need a few lines for this. Draw a few lines that create the flow of the hair. Start on either side of the part and work your way down to the ends. Some of the pieces should only go halfway.
Step 5 – Lift the Front
Hair is always lifted in the front. The hairline indicates where the hair grows from then another line indicates where it begins to fall.
Step 6 – Start Adding Texture
This is a good time to start adding a bit of texture. You shouldn’t add all of the texture yet but add enough that you can see a final vision in your head.
Step 7 – Divide the Strands
The texture of the hair – curly, straight, kinky – will affect how this step works. You need to separate the hair into strands. The strands are the chunks of hair that naturally cling together.
Step 8 – Divide the Hairs
This is a time-consuming part that some artists rush through. Draw each hair or two separately, so each strand has individual hairs.
Step 9 – Start Shading
Learning how to shade is a difficult step for any artist. When drawing hair, the part and underneath is shaded in dark colors while the highlights are added throughout the top.
Step 10 – Finish Texture and Shading
At this point, you can finish the shading and texture. Every piece of art will finish up in a unique way, so go with the flow and follow your artist’s heart.
How To Draw Curly Hair
Curly hair requires a different set of steps when drawing. Because the texture is unique and there is extra volume, it requires a different tutorial on how to draw hair.
Step 1 – Draw a Large Outline
The initial outline for curly hair should be lifted far above the head.
Step 2 – Frame the Face
Frame the face so that there are faint lines on either side.
Step 3 – Squiggle the Lines
Squiggle the lines that you’ve already drawn, and then add a few more.
Step 4 – Create Strays
Stray hairs are a given for curly hair. Draw a few near the part and then a few more that lift out to the sides.
Step 5 – Fill In Base
Add plenty of curls throughout the frame of the curly hair.
Step 6 – Balance As You Go
As you draw curly hair, try to counterbalance what you do but don’t do it perfectly. If you try to make it perfect, you’ll end up with what curly hair enthusiasts call the Christmas tree look.
Step 7 – Connect the Strands
Connect each curl you created at the bottom by creating strands.
Step 8 – Shade
After you finish your strands, you can work on individual hairs and add shading.
Best Pencils To Use For Sketching Hair
- Best for Base – B Pencil
- Top Pencils for Light Shading – 2H to 5H
- Best for Dark Shadows – 6B
Common Mistakes When Drawing Hair
- Rushing
- No Highlights
- Flat Shadows
- No Blending
- No Movement
Tips For Drawing Hair
A few tips on drawing hair can help you as a beginner artist, even if you’re an intermediate artist who has just begun learning how to draw hair.
Use Varying Highlights/Shading
Use varying pressure and pencils to create shading and highlights. This creates depth that using only one pencil with a single pressure will.
Imagine the Color
Even if you only draw in black and white, it helps to imagine the hair did have a color. When you imagine a colorful picture, it’s easy to add realistic depth and shading.
Use a Reference
When you draw hair, using a photo or real-life reference can fill in the gaps of an artist’s block.
Become a Hypothetical Cosmetologist
Every strand of hair has a place. If you don’t understand how the hair should lay – and how it is cut – then it isn’t easy to make it look real. Spend some time learning about hair to become a master.
FAQ
Why Is Drawing Hair So Hard?
Drawing hair is difficult because it has a lot of depth and texture. There’s nothing flat about hair. So even when drawing a cartoon, you must create a 3D element for the hair.
What Is The Easiest Hair Style To Draw?
Straight or slightly wavy cartoon hair is the easiest to draw. Realistic hair is the most difficult to draw.
How Do I Practice Drawing Hair?
To practice drawing hair, all you have to do is start. You can use any paper and pencil to get started and become comfortable with different techniques. Compare your results six months ago to your results now to see your progress.
Conclusion
You may not learn how to draw hair overnight. Every new skill that an artist must learn takes patience and practice.
Learn the steps to drawing hair and the aspects of each type of art. After doing this, it won’t take long before you notice that each work of art you create is better than its predecessor.
