Coffee is consumed by the average adult at least two times every single day, in every single country, in every single continent around the globe. Coffee has been in households for centuries now in some shape or form, with various flavours available.
Depending on the culture (or even personal preference), coffee might be black, with creamers or other dairy products, with sugar or other sweeteners, mixed with hot chocolate to create a mocha, or chilled to create iced coffee. Whatever your preference, sometimes you just want your coffee to be a little sweeter without having to add in tons of fattening sugars.

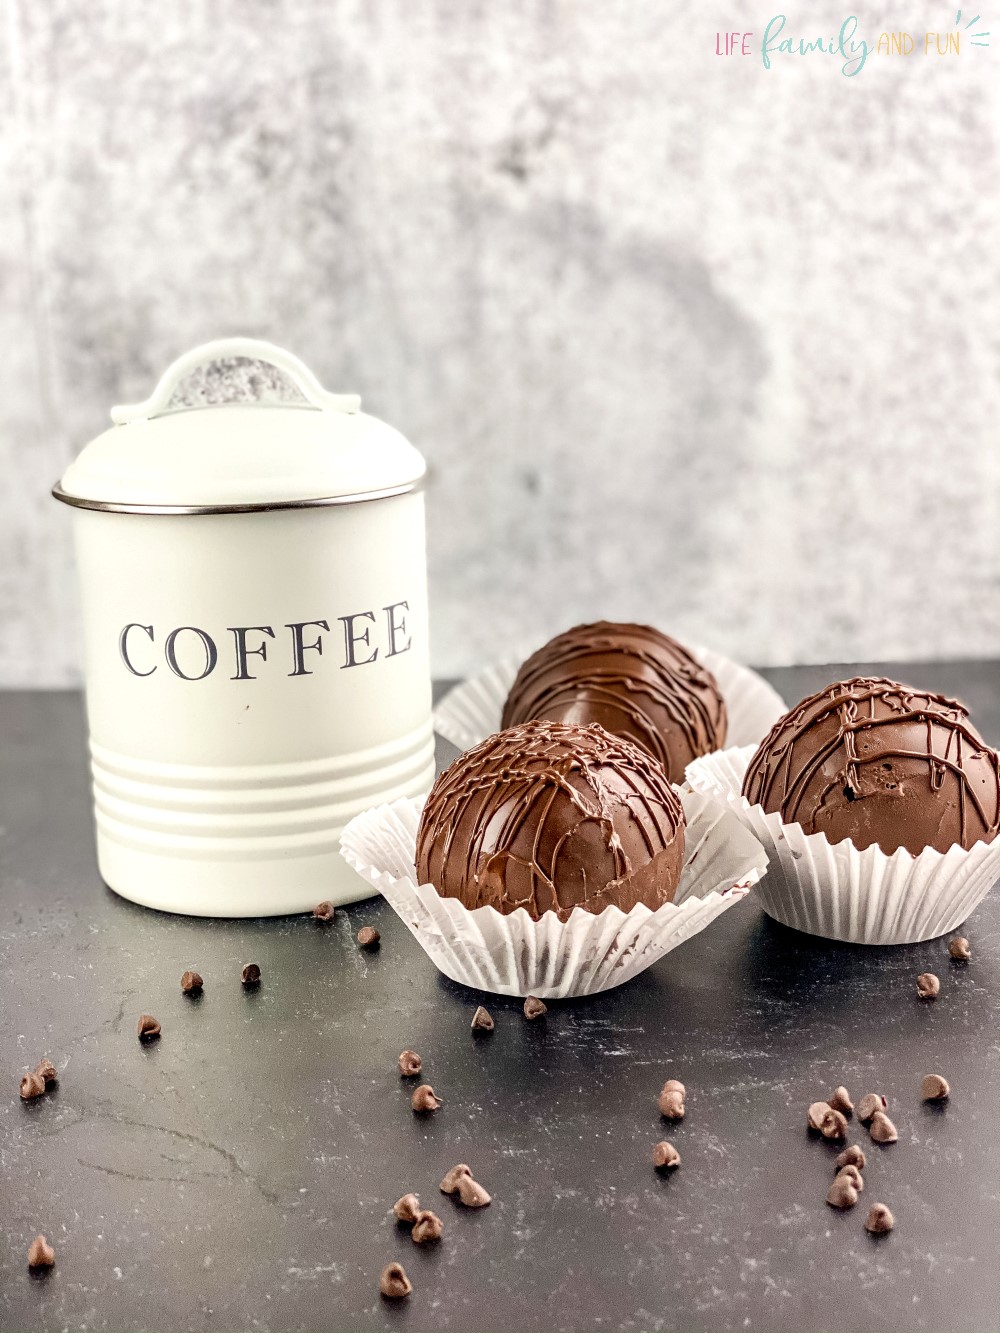
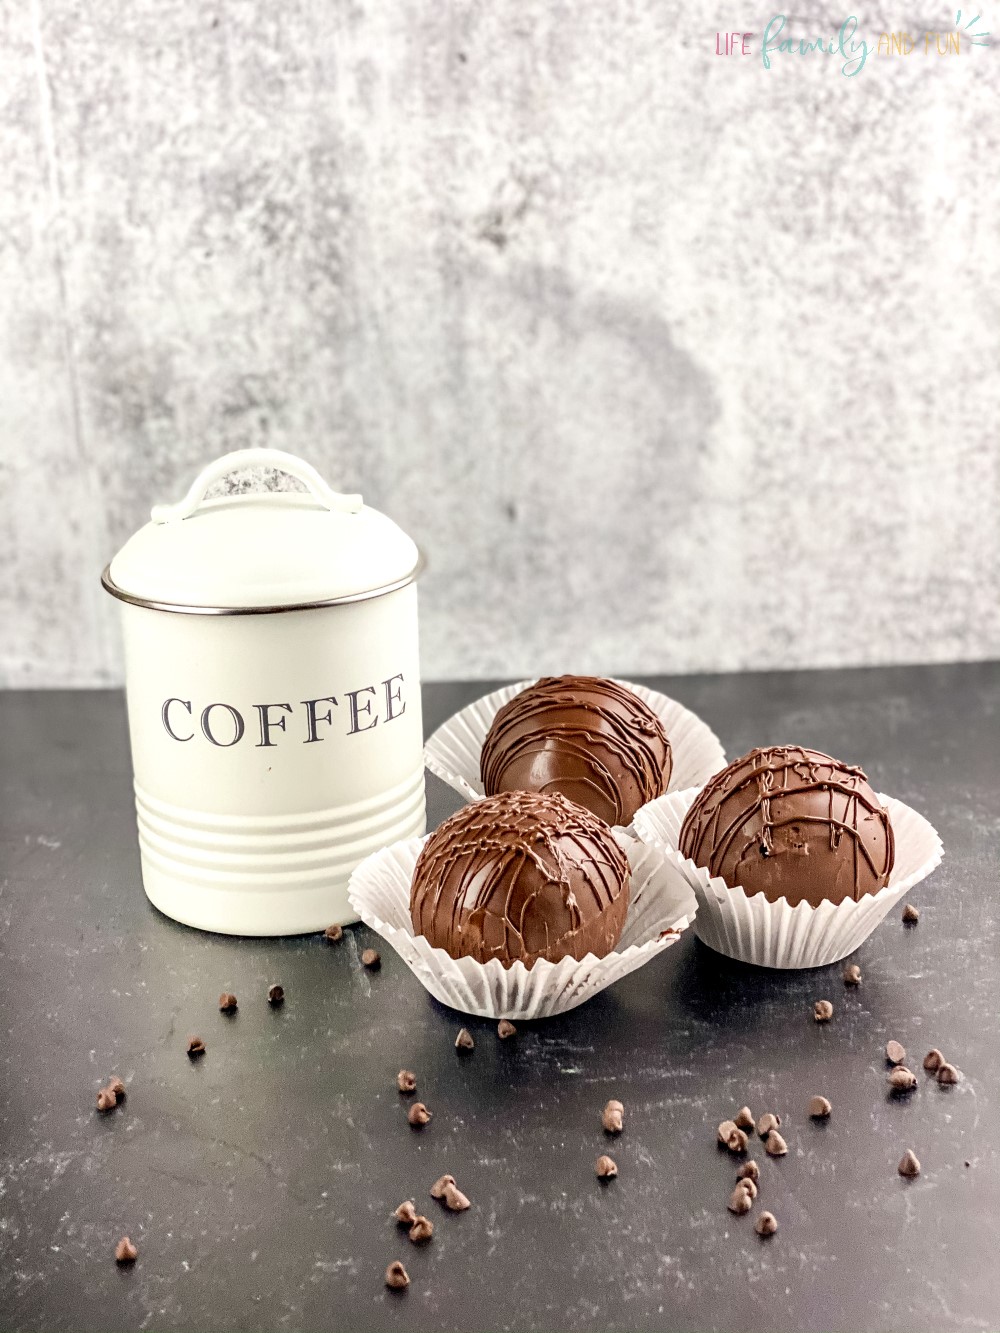
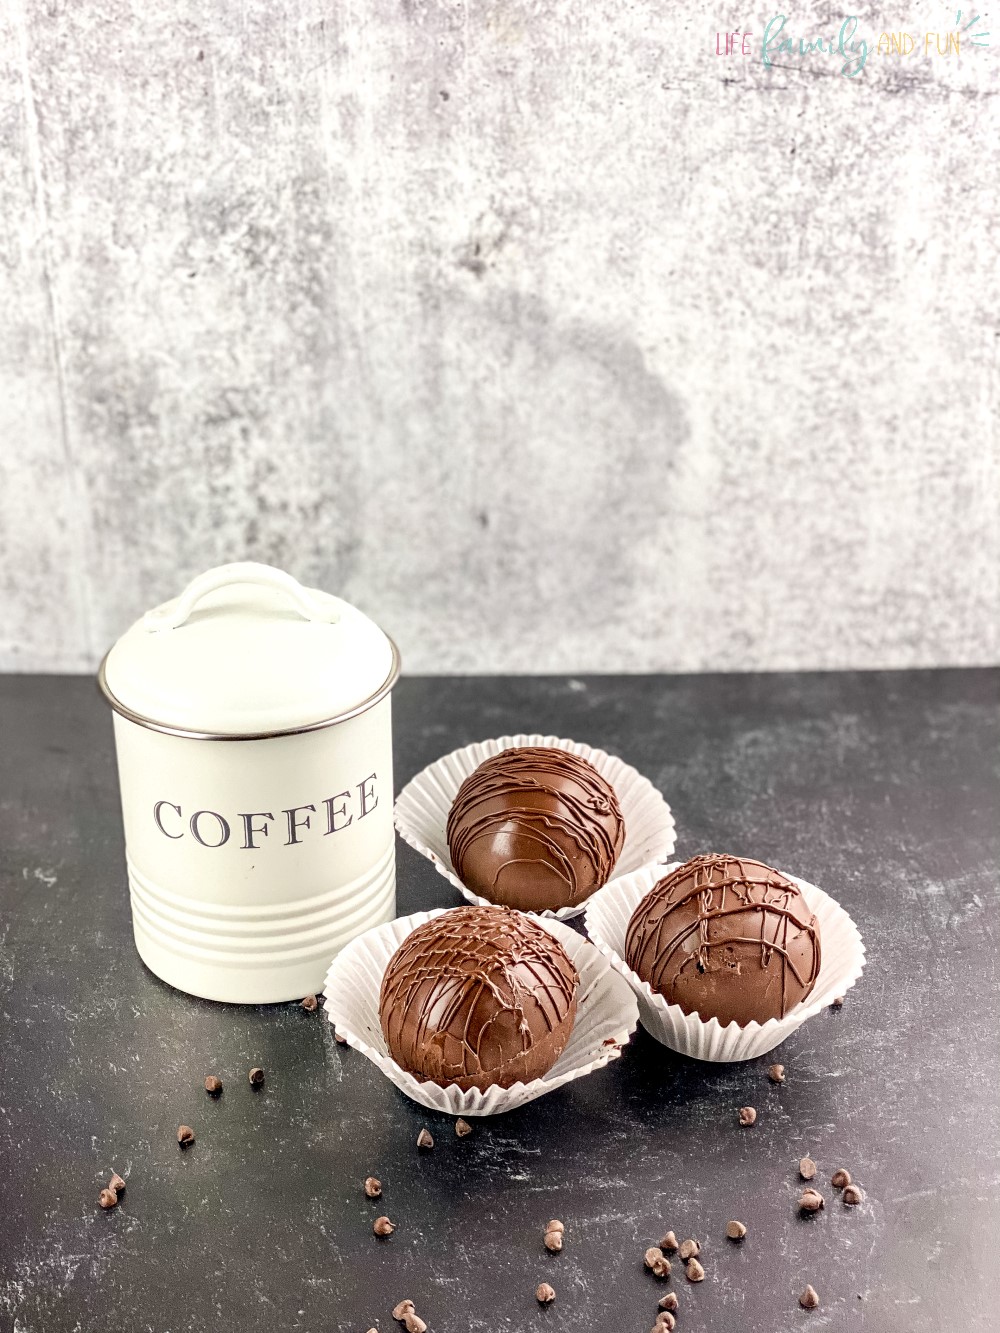
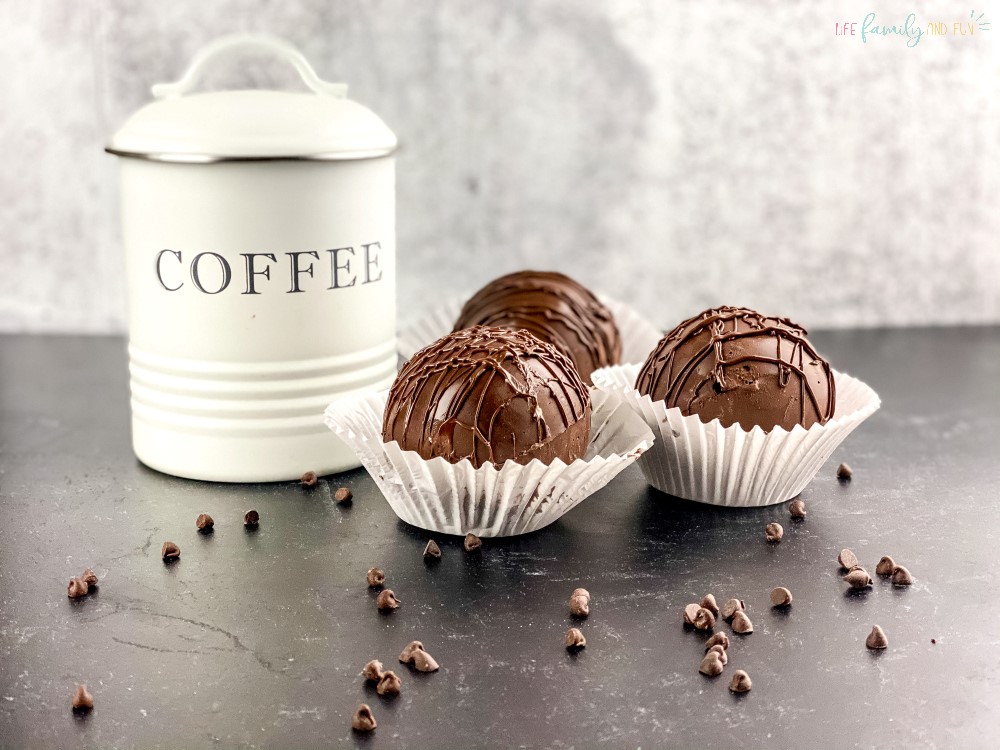
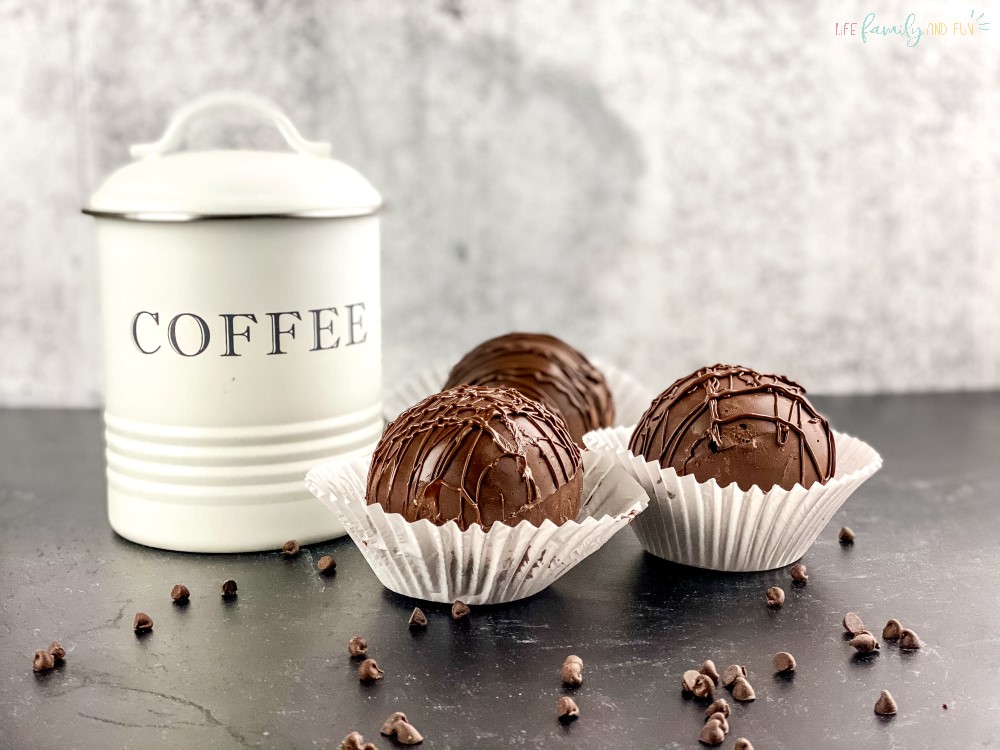
That is why today we are going to take a look at how to make homemade chocolate coffee bombs! These little beauties are dropped into your favorite mug, topped with piping hot coffee (brewed or perked is the best), and drank down just like a warm hug to your soul (and stomach). Let’s get started but first? Some background.
Where Does Coffee Come From?
According to Walton Holcomb’s research, coffee in its purest form is 100% natural from plants that are grown in what is deemed the “Bean Belt”. The Bean Belt is the countries that surround the equator between the Tropics of Capricorn and Cancer. The hot weather is the best climate to grow the coffee plants on which the beans are formed when they are fully ripened.
These little berries are then shelled from the plant and roasted using a variety of methods to create the dark coffee bean we are used to seeing when we open a bag to grind and brew.
What are Coffee Bombs?
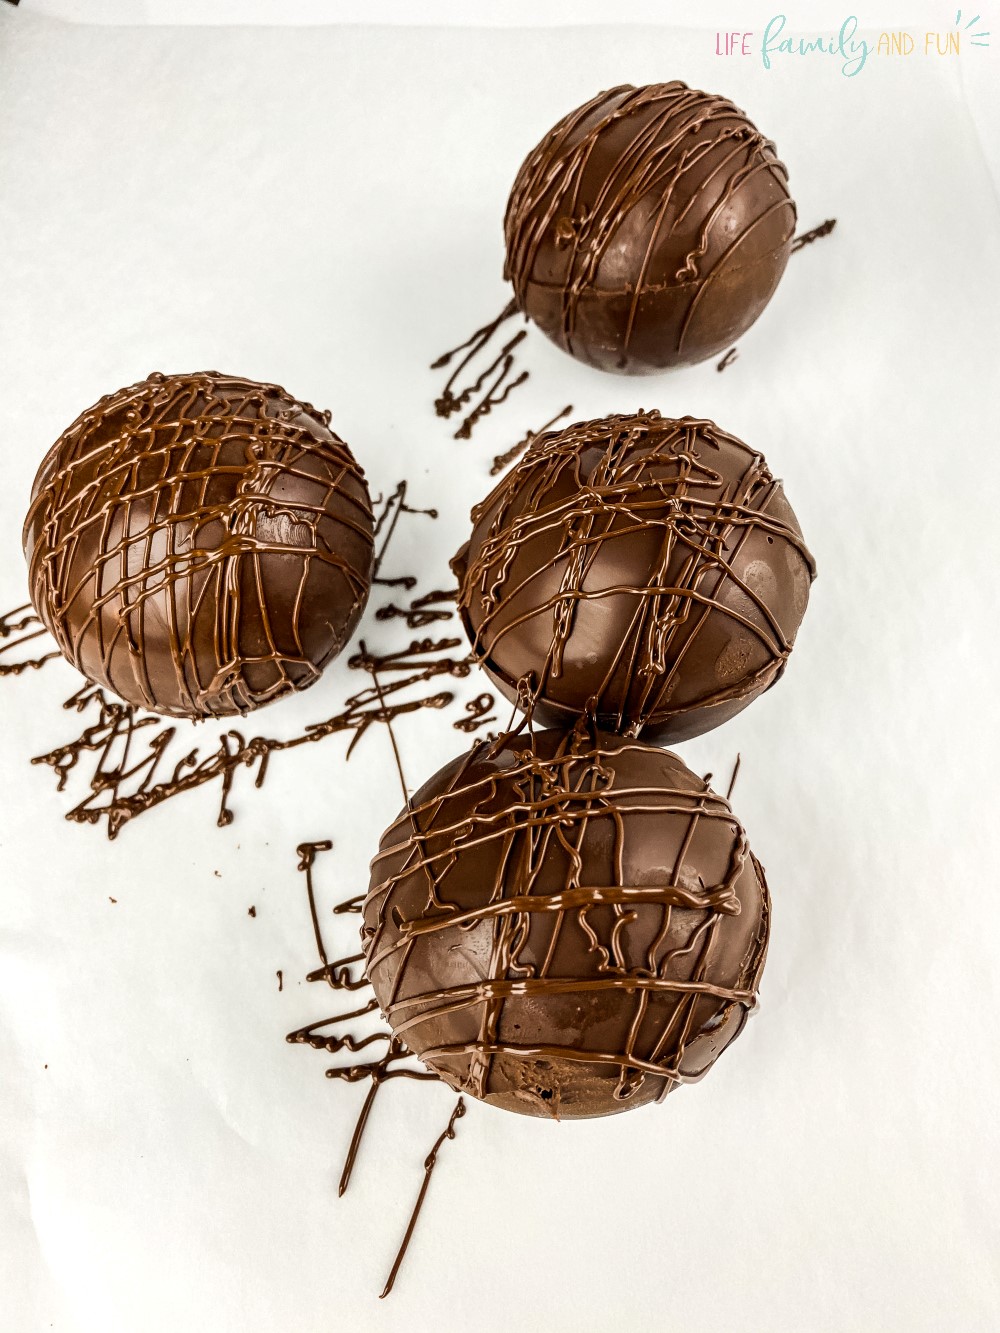
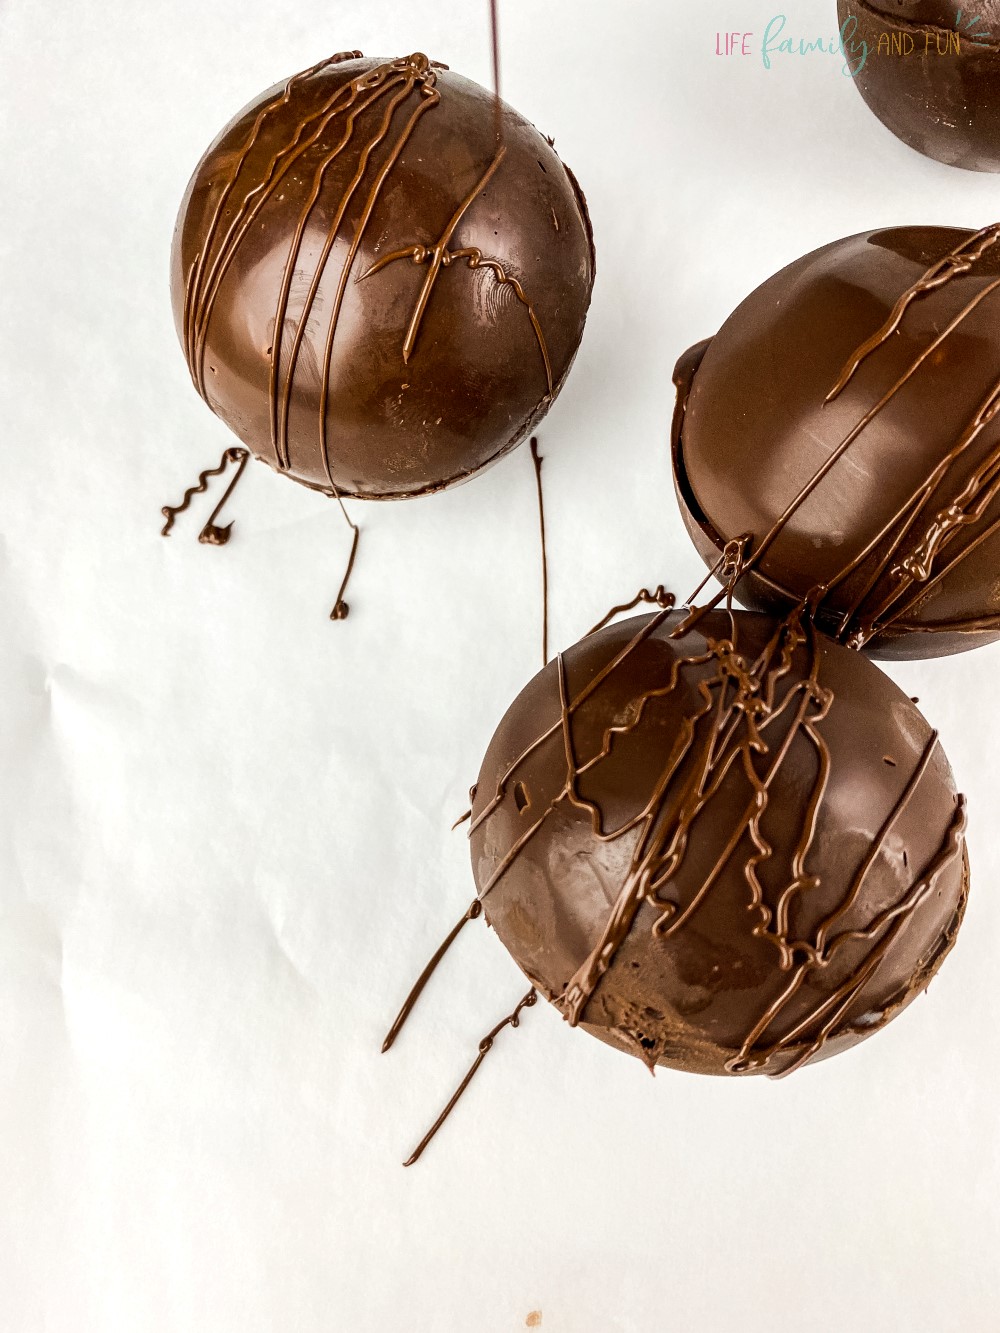
Coffee bombs are molded chocolate balls – some made with filling, some made without – that are meant to be placed in the bottom of a mug and then paired with hot coffee. The hot coffee melts the chocolate (or explodes the bomb) to release the filling and flavoring into your drink.
When you enjoy a coffee with a coffee bomb, additional sweeteners or additives are not recommended or it will taste like you are drinking pure sugar. You can add a cream or milk base if desired or if you are of legal age? You can make sure that your coffee bomb is of the Irish variety. However, today we are taking a look at a chocolate bomb that can be enjoyed by a variety of ages or non-drinkers. This one is more of a lovely dessert after a filling meal.
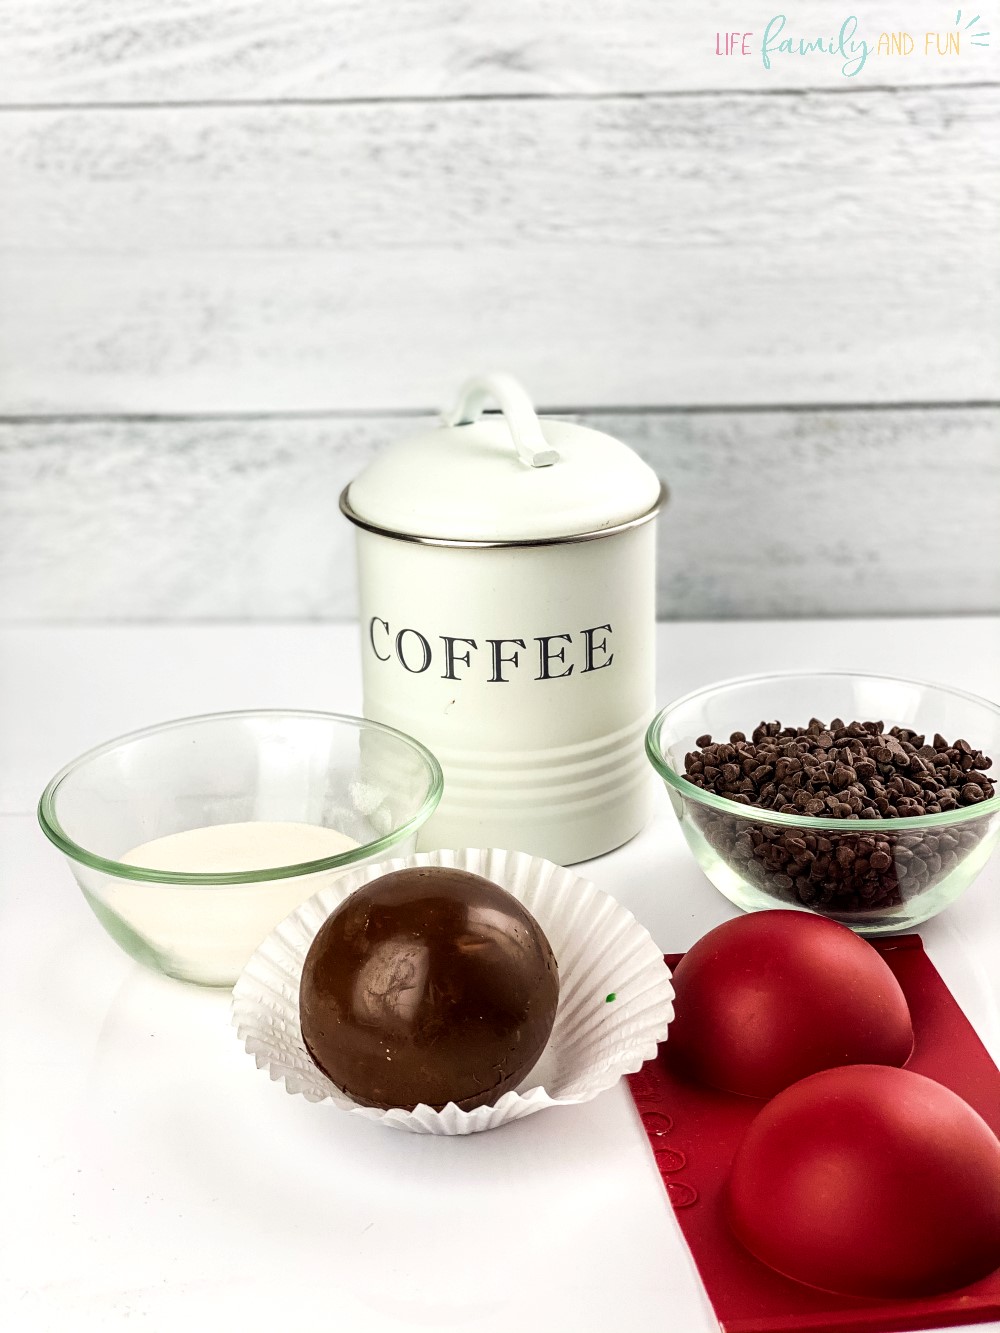
Equipment Needed
- Microwave safe bowl (medium to largish)
- Spoon (wooden or metal)
- Silicone cavity mold that creates 6 spheres
- Kitchen scissors
- 2 plates that are microwave safe
Ingredients to prepare the Coffee Bombs:
- 1 ½ cups of milk chocolate chips
- French Vanilla powdered coffee creamer
- Fresh brewed coffee – perked or brewed will create the best results
How to prepare the Coffee Bomb: Step By Step Guide
Before starting any preparation on your ingredients, set up your workstation and get your equipment ready.
Place a plate in the freezer and leave it there until it is needed. This will allow the plate to get nice and cold – which is a major thing you’ll need as you create your coffee bombs.
Step 1: melt chocolate
Melt the chocolate chips in the microwavable bowl. Use the highest heat setting you have for exactly 60 seconds.
Stir the chocolate with a spoon to gauge the melting process. If the chocolate chips are starting to melt, reduce the power levels on the microwave to medium/medium high (or approximately 60%).
Continue to melt the chocolate chips at 30 second intervals to prevent the chocolate from burning. You’ll have to do this roughly two more times, but it could take up to four more.
Remove the chocolate after each interval and stir with a spoon to mix the hot chocolate into the room temperature chocolate. Watch and smell for burning chocolate!
Once the chocolate is mostly melted when you stir it; it is time to heat it for the final 15 seconds.
Remove the chocolate and give it another stir to ensure that there are no chunks or lumps. You want to be left with a smooth consistency of chocolate.
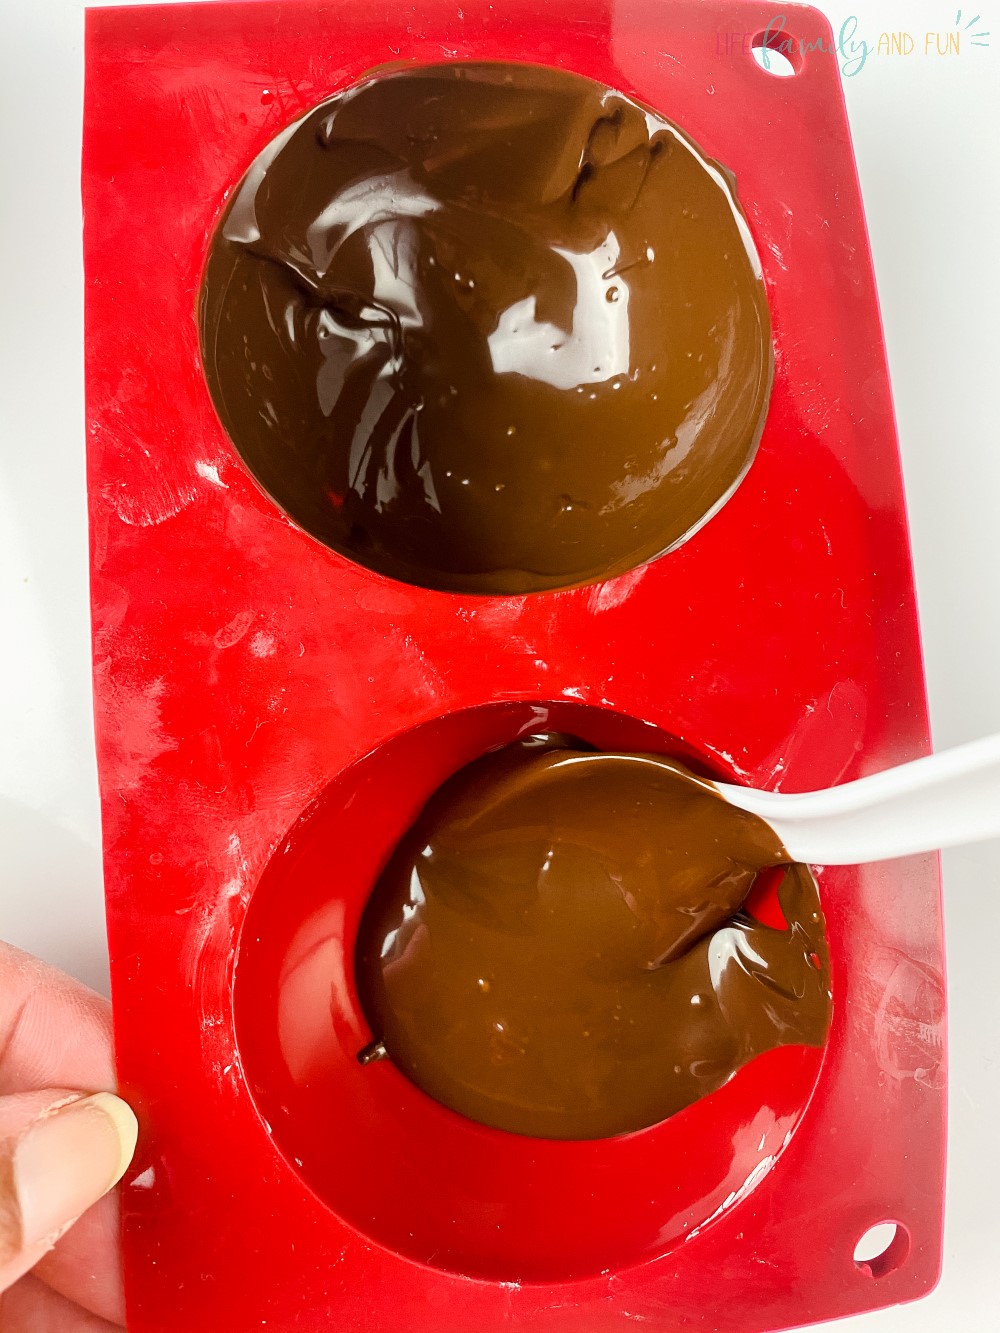
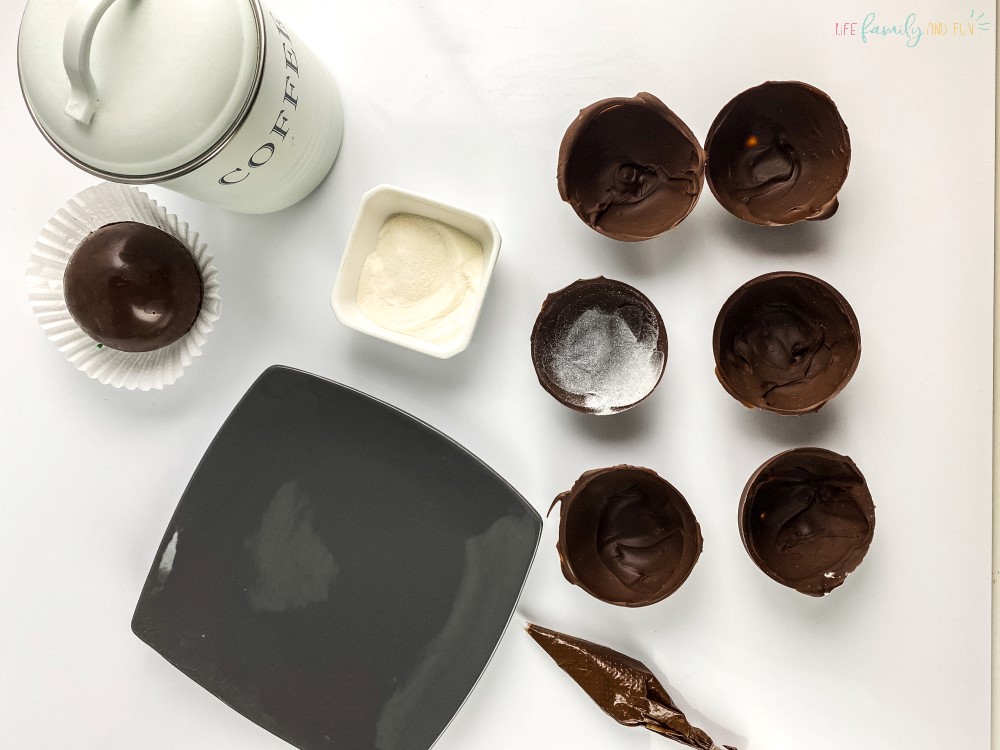
Step 2: fill molds
Using a spoon, fill the cavities of the molds with a dollop of chocolate.
Use the back of the spoon to completely fill the mold and coat it thoroughly to create a hollow sphere. Wipe away any excess chocolate.
Note: when coating the sides, pay careful attention to the rim as the chocolate will need to be able to be “glued” together. If you don’t fully coat the mold and bring the chocolate up the sides, the two pieces won’t fit together. You should not be able to see the color of the inside of the molds and if you can? You won’t have a sturdy structure for your coffee bomb.
Once all the molds have been filled, place the mold in the freezer for 10 – 15 minutes to harden and set.
While the spheres are freezing, prepare your ingredients for the inside contents of the coffee bombs.
When everything is ready, remove both the molds and the frozen plate from the freezer.
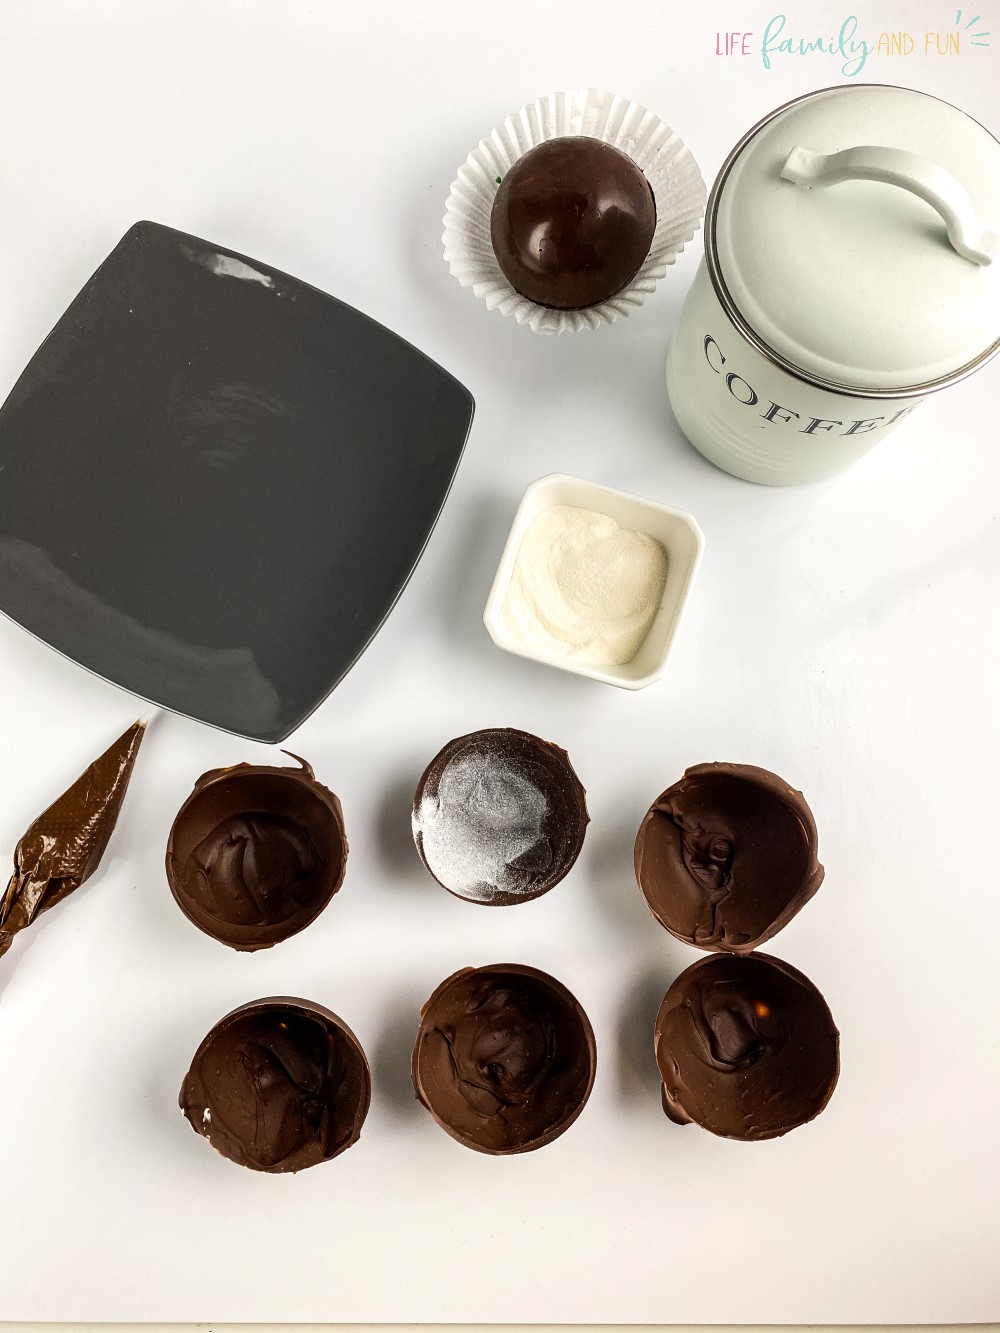
Step 3: remove from molds
Carefully remove the spheres from the silicone mold and set them on the cold plate to keep them from melting*.
*Body heat melts chocolate quickly, so use gloves or touch the bombs as little as possible once they are formed in the molds. The cold plate will help alleviate the temperature of the bombs as well.
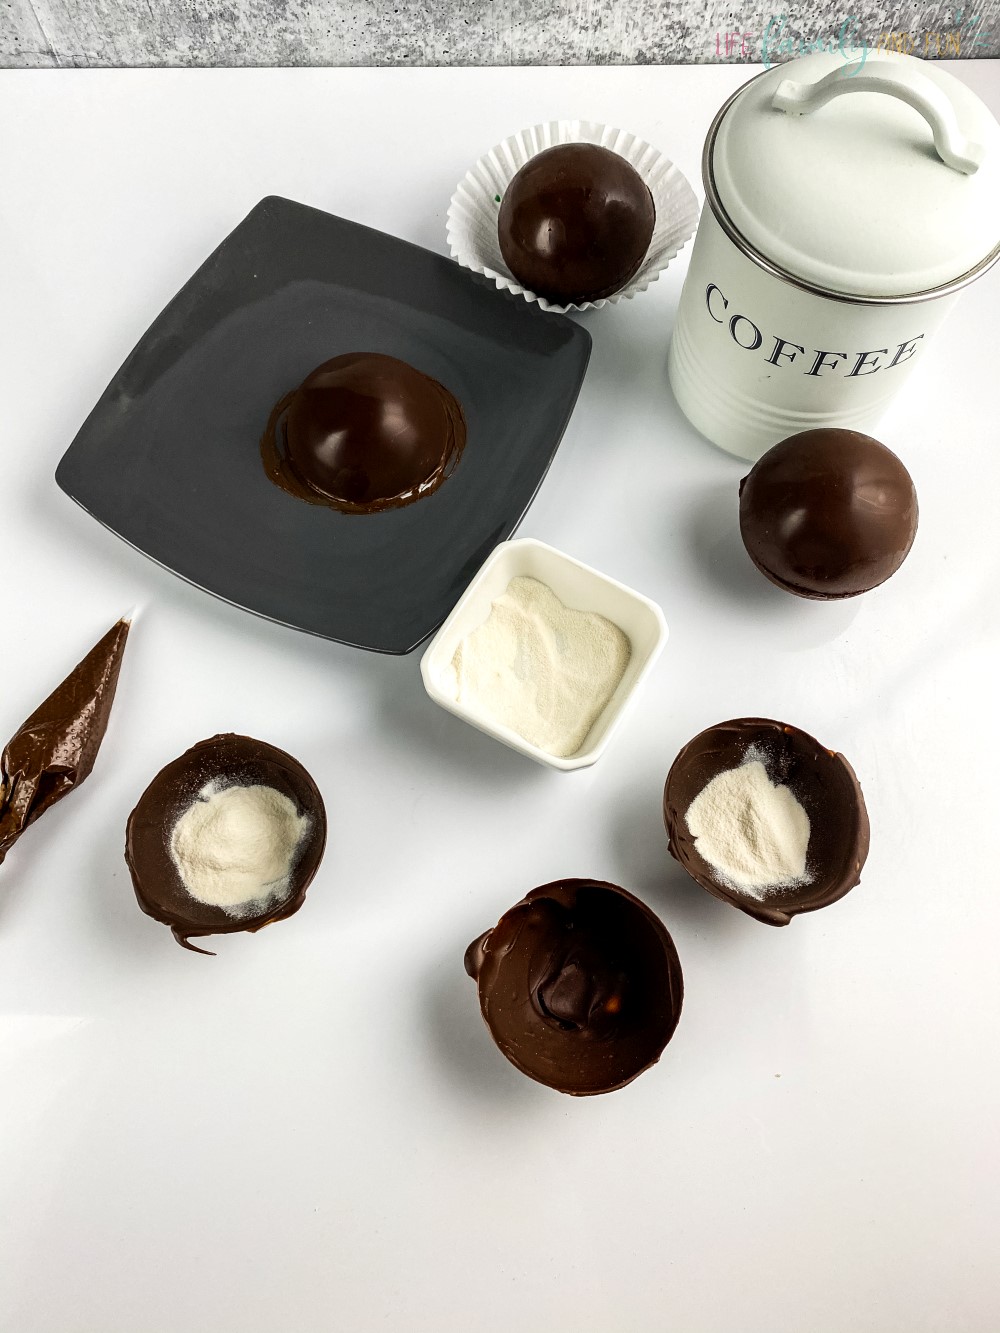
Step 4: fill and ornate
Add coffee creamer to the bombs – you choose the amount you want and the flavour. You can also add other dry ingredients you’d like in your coffee such as flavoring, sugar, and more.
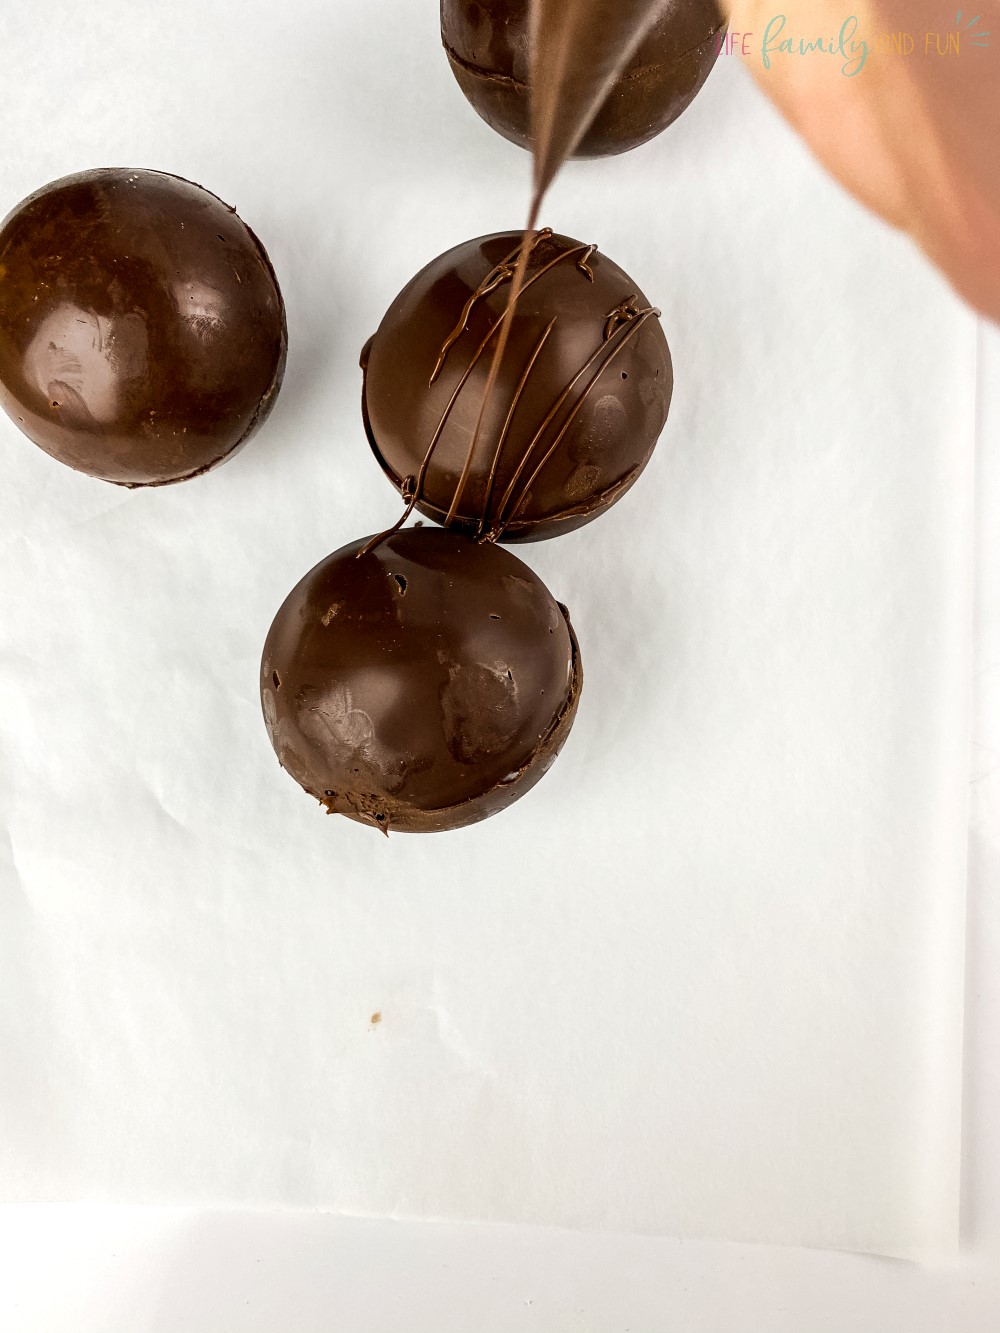
Step 5: connect and assemble
Place the second plate in the microwave for two minutes on high heat.
Connect the bombs together using the now hot plate to melt the rim of the spheres.
Place the top half of the sphere on the hot plate to lightly melt the edges of the bomb and stick them together.
This is the Hot Plate Method for making coffee bombs. The hot plate from the microwave will hold the heat without the risk you burning yourself.
An alternative method is the Pipe Melted Chocolate Method. This method uses leftover chocolate. Add the chocolate to a piping bag (or a small Ziploc baggie, concentrated to one corner). Cut a small hole in the end of the piping bag or in the corner of the Ziploc bag. Squeeze the chocolate around the rim of the bottom sphere and simply place the other sphere on top. Using your finger, smooth the excess chocolate out to seal the two halves together. You can leave it as is then or add sprinkles, candies, etc. to your coffee bomb.
Step 5: set
Place the bombs in the refrigerator to finishing setting while you perk a fresh pot of coffee. Remove the bombs, put one on its side in a mug, and pour your piping hot coffee directly on the seam to break it apart! If the coffee bombs are being made in advance, they can be frozen in a freezer-safe container for approximately two weeks.